How to Implement Caching on Your WordPress Website
In this article, we’ll introduce you to the basics of caching, how you can test your site to identify speed issues, and help you decide if caching can help minimize those problems.
‘Caching’ is a term you’ve almost certainly come across multiple times when creating a WordPress website. However, what does it actually mean, how does it work, and why should you care? In short, caching can be a critical tool for improving the performance and speed of your website.
While the concept itself is simple, it can be difficult to know where to begin if you want to implement it on a WordPress site. Fortunately, there are many WordPress caching plugins available to help you get started.
What Caching Is (And Why It’s Important)
In short, caching refers to data that’s saved and stored temporarily. The next time the user accesses the site, they don’t have to load every single file from your site; it will be saved in the cache, which will significantly speed things up.
On the other hand, if a site is not cached the browser will need to load its entire contents — including all text and media files — every time the site is loaded. This will happen even if nothing has changed since the last visit.
It’s also worth noting that these caches can be located in more than one place:
- Client-side caching — This is also known as ‘browser caching’ and refers to a process that most internet browsers today perform automatically. The browser will save static data — such as CSS, JavaScripts, and images — on the user’s local hard drive and re-use them the next time the site is accessed from the same device.
- Server-side caching — This type of caching occurs on the server-side, and is what you primarily need to think about when optimizing a WordPress site. This is especially true if you run a traffic-heavy site or even a low-traffic site on shared hosting. This can also be a lot more complex in nature, which depends on your site’s structure and requirements.
More involved systems also use multiple caching servers at once, also known as ‘reverse proxy servers.’ These work as a middleman between the visitor and the site by sitting ‘in front’ of the server where the WordPress site is hosted.
We’ll be taking a closer look at reverse proxy servers later on in this article, but for now, we’re going to check out how to assess your own site’s needs.
How to Determine Whether Your Site Has an Issue With Loading Speeds
In short, it’s crucial that your site loads quickly. Finding out how your site loads in other countries is also important, especially if you have a global audience. Fortunately, there are many tools available to help test your site’s performance.
This will give you a better idea of how quickly your site loads, and also how the site performs to users depending on their geographical location. Let’s look at two of our favorites.
1. Pingdom Tools

Pingdom Tools is a very simple and useful tool that will test your site based on several different metrics. Most importantly, it will provide your site loading speed, but it also returns the page size, the number of requests, and gives it an overall performance grade to assess your site at a glance.
Perhaps the best thing about this tool is how quick and easy it is to use. You simply enter the URL for the site you want to test, use the drop-down menu to select the location of the ‘user,’ then click Start Test. If the service is particularly busy, you might be placed in a short queue, but it generally takes less than a minute for your test to complete.
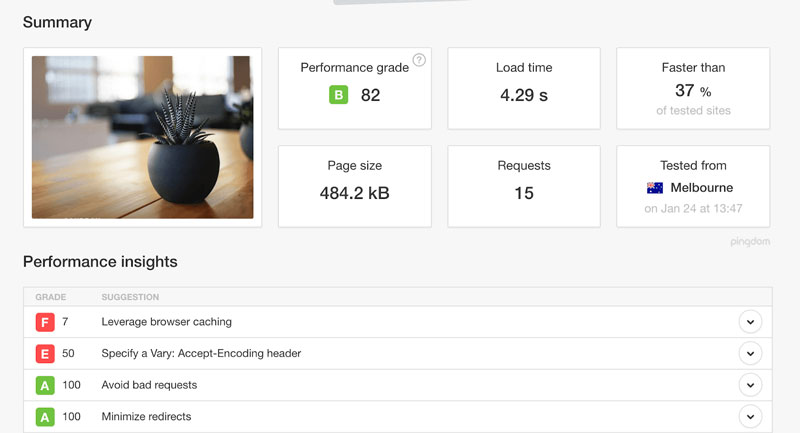
Once it has done so, you’ll see its results on the page. You can scroll further down to see more advanced information about specific parts of your site, and there’s a handy ‘legend’ to help you decipher what you’re reading.
In our opinion, it’s always a good idea to run the same test a few times, because no test will ever return the same results. You should also try out a few different locations to make sure you get a comprehensive view of how your site performs globally.
2. LoadImpact
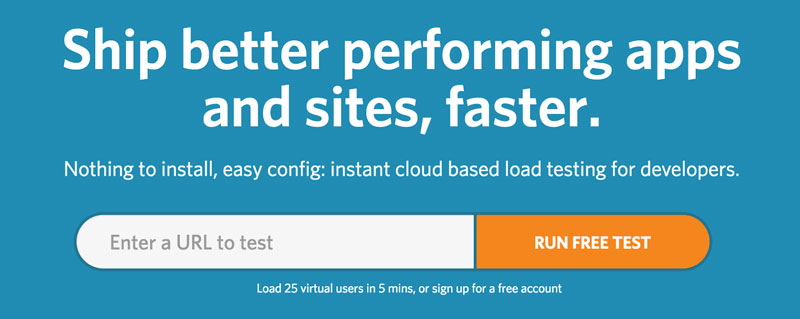
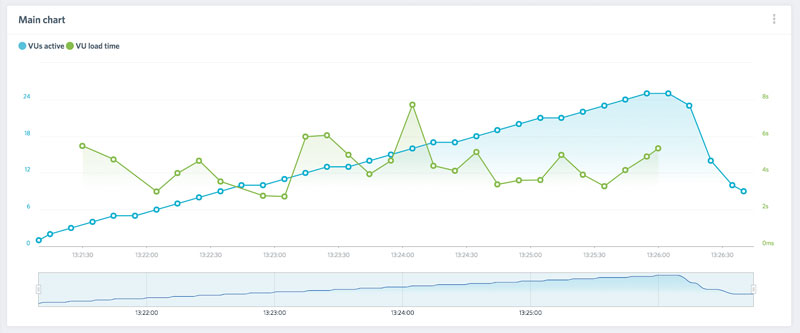
LoadImpact is a more advanced alternative than Pingdom Tools, but it also offers you more incisive data. Essentially, this solution is concerned with how multiple visitors affect your loading speeds. It loads 25 virtual users over a five-minute period and plots the results on a graph in real time.
To use LoadImpact, enter a URL and click Run Free Test. The server loading will begin straight away and will return the resulting data in real time. You’re free to open new browser tabs while the test is running, but navigating away from the page will mean you’ll have to restart the test.
Beneath the main graph, you’ll find some additional information, such as bandwidth usage, the loading time for different types of content, and more. As with Pingdom Tools, we recommend running the test a few times to get the most accurate data.
Deciding Whether Caching Is the Right Solution For You
So far we’ve talked a lot about caching and the need to keep your site fast and well-optimized. However, is caching strictly necessary to accomplish this? Implementing it on your site will not just improve User Experience (UX), it can have a tangible positive effect on your bottom line as well.
Having a slow loading website is no small problem, as it can be catastrophic for your bounce rate. It’s no secret that people are far more likely to leave a site if it doesn’t load quickly and reliably. In fact, 47% of internet users expect sites to load in 2 seconds or less, and a single second delay can lead to as much as a 7% reduction in conversions.
The speed at which a site loads can also affect search engine rankings, so if your site loads quickly it’s more likely to appear higher in search results. When every second counts, it’s important to use every tool available to you, and caching is a great and simple way of ensuring your site runs rapidly.
However, you should be aware that while caching is a great tool for optimizing your site, it can cause issues. The most important of these is the risk of displaying old, outdated content on your site — most pertinent for constantly updated websites.
Obviously, making the loading times shorter is pointless if the site itself doesn’t show the correct content to visitors, so you need to make sure that the cache is cleared (or ‘purged’) appropriately.
If your site also contains a lot of dynamically updated content, such as a storefront with a shopping cart or a live Twitter feed, be aware that caching can interfere with these. In these cases, it may be best to consider which parts of your site to cache beforehand to avoid causing problems down the line.
While we recommend you implement some form of caching solution on your website, you shouldn’t stop there. As we pointed out earlier, optimizing your site’s speed should be a high priority and caching is only one tool at your disposal. There are plenty of other things you can — and should — do to improve your site’s speed. We recommend considering the following:
- Reducing the size of your images. Uncompressed images are a common reason behind slow loading times. It’s therefore important to optimize your site’s media. This can either be done using an image editor or WordPress plugin.
- Optimizing your database. You should routinely check that your databases are in good health. If this sounds too technical, don’t worry. Using a plugin such as WP-DBManager lets you check, repair, and backup your databases easily.
- Checking your site’s speed regularly. We already talked about how to test your site using online tools, but it bears repeating. Over time, the performance of your site will change, depending on its contents and structure, so it’s important you keep up to date with testing to stay ahead of problems.
4 WordPress Cache Plugins to Improve Your Site’s Speed
Once you’ve decided to implement caching on your WordPress website, it’s time to choose a plugin that suits your needs.
It’s important to note that most WordPress hosting providers have a prefered caching method and might have already set it up for their users. For example, you don’t have to install any caching plugins when you use our DreamPress service. So be sure to check with your hosting provider before you install anything.
With that bit of background out of the way, here are four of our favorites.
1. Varnish HTTP Purge
First up, Varnish HTTP Purge stands out from the rest of the plugins on this list because it doesn’t actually save to cache, but instead enables you to purge the current cache. This plugin is based on the open-source application Varnish, which is a reverse proxy server that helps increase your site’s speed even with heavy traffic. It can also be hugely helpful if your site goes down, as it will continue to display the cached version to users.
The Varnish HTTP Purge plugin can be used on sites that already have Varnish installed, enabling you to clear the site’s cache manually. Purges will also occur automatically when appropriate, such as when new content is added to the site.
It’s important to note that this plugin does not install Varnish on your site. However, DreamPress users don’t need to worry as we install Varnish by default (you’ll have to make sure the rules line up; more on that later. Let’s look at the key features of this plugin.
- It enables you to manually purge your site’s cache.
- The cache automatically clears when new content is added.
Varnish HTTP Purge is open-source and free to use, with no premium tier needed.
2. WP Super Cache
Next up, WP Super Cache is an extremely popular WordPress cache plugin with over a million current installs. It’s not hard to see why either, as it is both highly customizable and friendly for caching beginners.
Depending on your site’s requirements (and your level of expertise) you can select one of three modes: Simple, Export and WP-Cache. The plugin itself works by creating a static HTML copy of your site that’s comparatively smaller than the standard pages.
Let’s check out the highlights.
- It’s very flexible with plenty of customization options.
- The Simple setting is a great place for beginners to start. However, the plugin is a lot more useful when you enable the mod_rewrite feature.
- 99% of your users will receive static HTML pages, drastically cutting down the amount of data required.
WP Super Cache is completely free, developed by Automattic, and compatible with DreamHost.
3. WP Fastest Cache

WP Fastest Cache is another popular solution offering the ability to create static HTML pages. Alongside standard file minification, the plugin also features an option for combining JavaScript and CSS files to reduce the number of requests to your site — a key speed enhancer. Here are the standout features:
- It’s easy to use with optional customization.
- The plugin is fast and reliable.
- The premium version includes additional features, such as image optimization.
While WP Fastest Cache has a full-featured free version, there’s also a premium edition offering additional features for a one-time cost of $39.99.
4. WP Rocket
Finally, WP Rocket is a great plugin that not only provides a huge performance boost to your site but is also one of the most beginner-friendly solutions available. Despite requiring very little technical knowledge, WP Rocket can be setup to cache pages and compress static files to decrease loading. The plugin also improves your search engine rankings by pre-loading caches to make the site easier to index. Here are the highlights.
- The plugin offers powerful and robust performance that will significantly cut down on loading times.
- It’s very simple to configure.
- Your sites will be easier to index, meaning an improvement to your Search Engine Optimization (SEO).
- There’s reliable customer support on hand if needed.
WP Rocket doesn’t have a free version, but does offer a number of pricing plans, which start at $39 per year for a single website.
How to Implement Caching on Your WordPress Website (2 Methods)
Once you’ve found the cache plugin that best fits your requirements, you’ll need to implement it on your WordPress website.
We’ve settled upon the WP Super Cache and Varnish HTTP Purge plugins, mainly because they’re compatible with DreamHost, installed by default on DreamPress hosting, and are easy to implement and configure.
1. Installing and Configuring WP Super Cache
Let’s start by taking a look at WP Super Cache. Once you’ve installed and activated the plugin, you’ll also need to configure it to start caching your site. Within WordPress, head to Settings > WP Super Cache, which brings you to the Settings screen.
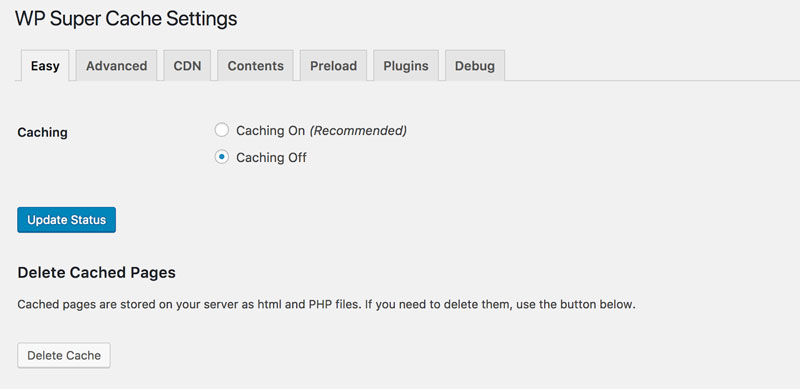
The first page of the plugin’s settings just contains two basic, but important, options.
- Caching — This determines whether or not caching is currently activated on your site.
- Delete Cached Pages — This enables you to delete the current cache, which may sometimes be necessary.
You can disregard the latter option for now. Instead, you’ll want to start caching your site. By default, this is set to Caching Off, but go ahead and select Caching On, then click Update Status to confirm.
When the site reloads, you’ll notice it now contains another option, the Cache Tester. As the name suggests, this is a tool that enables you to test if the caching on your site works.
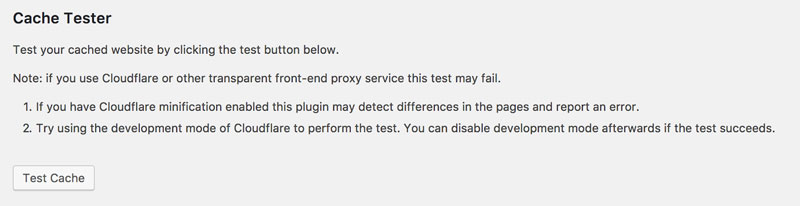
It’s a good idea to test your cache occasionally to make sure it’s still up and running. Go ahead and click Test Cache, and you’ll see the results display on the page.

That’s really all you need to do to implement caching. However, WP Super Cache includes a series of options for more advanced users, found in the various other tabs in the Settings page.
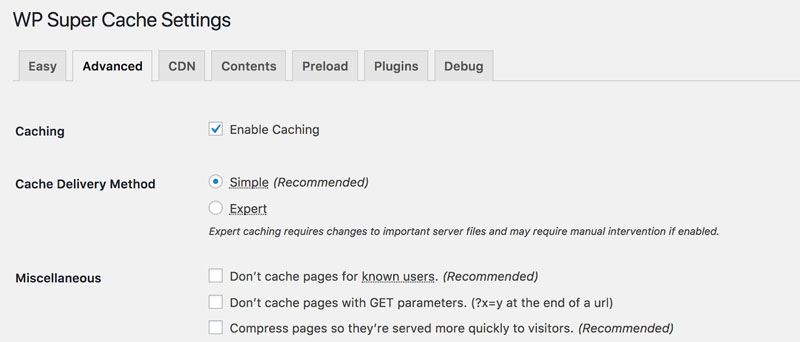
These default settings will work just fine, but we’re going to recommend one change here. This is the Cache Delivery Method setting, which by default is set to Simple. This method will serve your cached file using PHP, which can require a lot of resources – especially if you’re using shared hosting.
We recommend that you instead select the Expert option, which uses the mod_rewrite Apache module to serve your cached files. This may sound complicated, but in reality it just means that your cached files will served via HTML, bypassing PHP and making the process much faster.
Click Update Status to save the change. It’s possible that you’ll now see a message pertaining to mod_rewrite rules needing to be updated. Scroll down to the Mod Rewrite Rules section, which will show the rules that need to be modified.

If this section contains any messages, you can just click Update Mod_Rewrite Rules to resolve them. However, if this section is empty, you have no conflicting rules and you don’t have to make any further changes.
If you want to know more about the fine-tuning you can achieve with these options, refer to the official documentation for help and tips.
2. Using Varnish HTTP Purge to Clear Your Cache
The second plugin we want to look at is Varnish HTTP Cache. As we mentioned earlier, this is not a standard caching plugin but rather a complementary tool that can be used on sites with Varnish caching already installed.
While Varnish HTTP Purge is compatible with many plugins and themes, some may cause problems due to incompatible behavior or conflicting caching rules. In order to check that Varnish HTTP Purge is working correctly, you should access Tools > Varnish Status within WordPress.
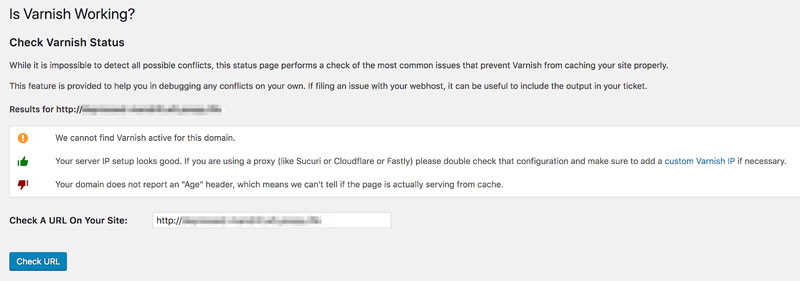
This screen will check and detect the most common issues that prevent Varnish from caching your site. You should aim to resolve all issues displayed here immediately to make sure that your site is cached properly.
The plugin itself is very simple to use. Once it is installed and activated, Varnish HTTP Purge will automatically flush the cache when changes are made to the site. This includes when a post or page is published, when the theme is updated, or when a new comment is added. It’s important to note that the plugin will not delete the entire cache but rather decide which cached files to flush depending on the update. For more information about what cached files are deleted and when, refer to the official documentation.
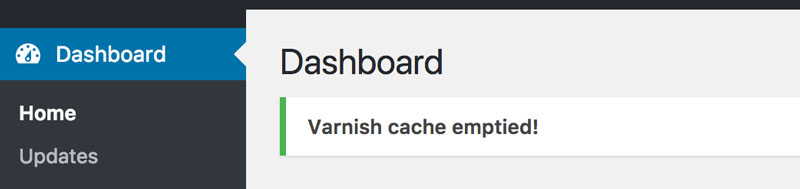
If you do want to delete the entire cache, you can do so manually. You’ll notice the new Varnish menu in the WordPress toolbar. Hovering over this will offer up a single option: Empty Cache (All). As you can probably imagine, clicking this will clear the site’s cache. It really is that simple.

Try it out, and you’ll see a message confirming that the cache has been emptied successfully:
That’s it! With these plugins installed and active, your site will now perform significantly better and load quicker.
We recommend testing your site’s speed once again to see the difference. Finally, remember that caching is only one part of the equation, so consider optimizing your site in other ways as well to achieve the best results.
Conclusion
Caching is an important tool to optimize your site’s performance. It can seem daunting at first, but fortunately, you don’t need a lot of technical know-how to implement it on your WordPress website. There are several plugins available for both experts and beginners alike, and using one will ensure that you see real results immediately.