Your Complete Guide to SSL/TLS and HTTPS

Between the ever-increasing global cybersecurity threats and Google’s tightening security standards, it’s more important than ever for business owners to take active measures to safeguard their sites.
Otherwise, you’re putting both yourself and your customers at risk. Not good.
But there’s hope! You can show users that they can trust you by offering them a secure, encrypted experience through something called Hypertext Transfer Protocol Secure (HTTPS). To use HTTPS, you will need to purchase a Secure Sockets Layer (SSL) or Transport Layer Security (TLS) certificate, which proves that your site is safe. We’ll cover more on this later.
This post will explain what SSL/TLS and HTTPS are and discuss the importance of having these features on your website. Then, we’ll show you how to implement an SSL/TLS certificate. Let’s jump in!
Related: 10 Ways to Secure Your WordPress Website
An Introduction to SSL/TLS and HTTPS
SSL and TLS are certificates that you can add to your website. They create encrypted connections between browsers and web servers. When you visit a site that uses a connection certified with SSL or TLS, only that site can access the data that you send.
SSL is the predecessor to TLS, which is now considered outdated and unsafe. However, the acronym ‘SSL’ is often used interchangeably when referring to either type of certificate. Therefore, we’ll be referring to them as ‘SSL/TLS.’
To set up SSL/TLS, you’ll need to install a certificate on your site. This will reassure users that your site is safe. In practice, your site will use the HTTPS protocol for establishing connections. You may recognize this as the secure version of the standard HTTP.
Here’s how HTTPS Protects Your Website
- Encryption to prevent data from being intercepted during the exchange process.
- Data integrity so attempts to tamper with the data are detectable.
- Authentication to prevent attacks and build user trust.
SSL/TLS enables you to deliver your site using HTTPS, which ensures a secure, private connection between your site and your users. If a site’s URL uses http://, it is not secured with SSL/TLS. However, if it uses https:// it is secure — and you need an SSL/TLS certificate to make that happen.
In Google Chrome, you can identify sites that are being served via HTTPS by the padlock icon in the browser bar. When a visitor requests to connect with a website, the page sends the SSL certificate, which contains the public key needed to secure the session. Then, the server and browser enter a process known as the SSL/TLS handshake. In a nutshell, computers communicate with each other to establish a safe connection.
Why an SSL/TLS Certificate Is Important for Your Website
Having an SSL/TLS certificate (and, in turn, serving an HTTPS connection) is critical to your website’s security. It ensures that nobody will be able to intercept or access the data transfer between your server and your visitors’ browsers (also known as man-in-the-middle attacks).
These aren’t the only types of attacks. Earlier this year, a vulnerability was found in mitmproxy: an open-source HTTPS proxy that would allow HTTP request smuggling attacks.
With so many security threats plaguing the internet, using the HTTPS protocol is a must. In fact, starting in July 2018, Google Chrome began listing sites that use HTTP as “not secure”:
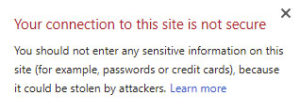
Losing Google’s trust can severely impact your search rankings. It can also make visitors wary of your site. After all, if their browser warns them that your site could be dangerous, you’re more likely to see a loss in traffic.

Google began changing its algorithm back in 2014 to favor sites using SSL certificates. Today, it’s placing even more emphasis on them, stating that those with SSL certificates will outrank those without, even when all other factors are the same.
Another important reason to install an SSL/TLS certificate is if you’re in an industry that requires you to comply with certain standards. For example, in the finance industry, it’s required to meet security standards regarding payment information. The Payment Card Industry (PCI) sets guidelines that site owners must comply with in order to safely accept credit card information on their websites.
Related: How to Accept Payments Through Your WordPress Website
How to Tell if Your Website Is Using SSL/TLS
It’s important to make sure that your website is using an SSL or TLS certificate. It’s also essential to continuously monitor it to make sure that it hasn’t expired. A Keyfactor report found that, within the past two years, 81% of companies faced a certificate-related outage.
If your certificate expires unexpectedly, it can put your site at risk. Outages can take hours to recover, and extended downtime can hurt your business.
Checking whether you have a valid SSL/TLS certificate is a very simple process. To get started, open your website in Google Chrome (or any other browser). Then, check the address bar at the top of your browser to see if your site uses http:// or https://.
You may also see a colored padlock next to the URL. If the color is red, then your site does not use SSL/TLS. However, if your site is secured with SSL/TLS, you may see a green padlock:

However, not all SSL/TLS-certified sites show this icon. Its presence depends on the type of validation used (more on this later). For example, some SSL/TLS certificates will display a simple grey icon instead:

This means that the site may not be secure, but the browser can’t determine for sure either way. If your site does not appear to be secured with SSL/TLS, you might still have a certificate. However, it has most likely expired, which you can check by clicking the warning icon next to the URL:
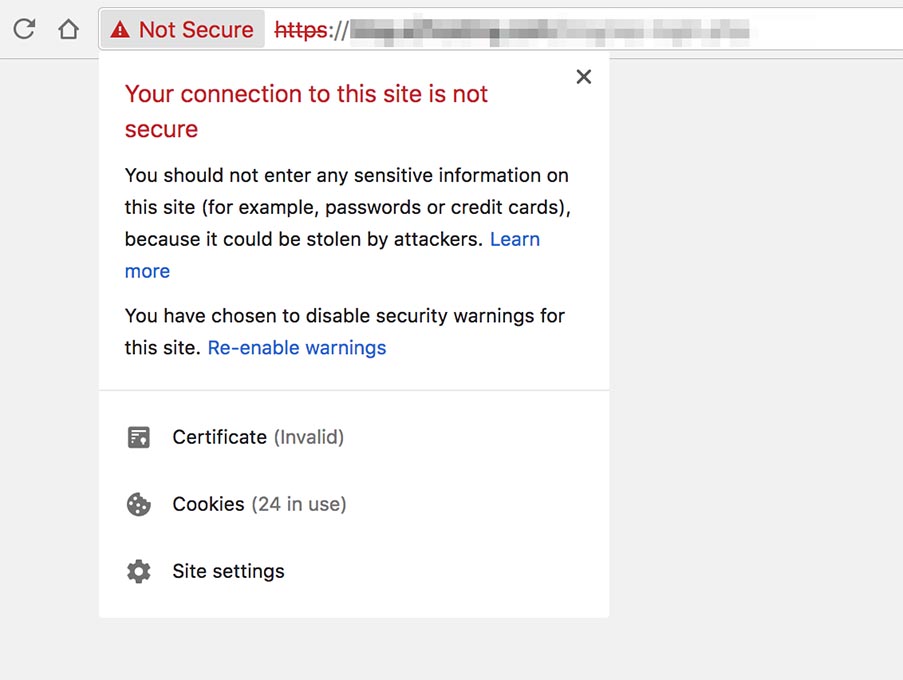
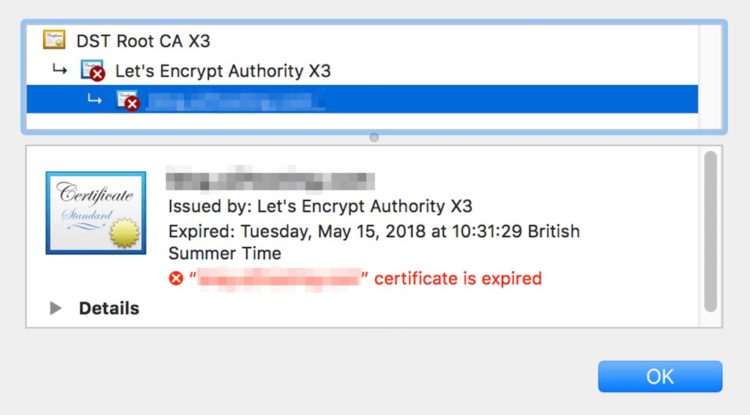
Here, you can click on the Certificate link to view more information. For example, we can see that this site does have an SSL/TLS certificate, but it has expired:
Finally, it is also possible that you do have a valid, up-to-date SSL/TLS certificate, but your site does not default to using it. In that case, you’ll need to force your site to redirect to HTTPS.
Different Types of SSL Certificates
If you’ve found out that your site doesn’t have an SSL/TLS certificate, you’ll need to purchase one. Before you do that, however, you need to know what kind of certificate you’re looking for.
SSL/TLS certificates come in many forms, all of which have their unique pros and cons. To acquire one, your site will need to be verified by a Certificate Authority (CA). Depending on the type of SSL/TLS certificate you decide to buy, your site will need to be checked for different information.
Your choice of certificate depends largely on your requirements and budget. Let’s go through the different categories to help you find the option that works best for you:
Domain Validation (DV)
This type of certificate requires you to prove that you have the right to use a specific domain. This makes it the least secure option. However, it’s also the cheapest type of SSL/TLS certificate, and you might even be able to acquire one for free. You can also get one approved very quickly — even within minutes. This is recommended for smaller sites that don’t handle sensitive data, such as blogs or portfolios.
Organization Validation (OV)
This is a more secure option, which requires a more thorough check of your website. The CA will vet your organization to ensure that you are legitimate and trustworthy. As such, this is also slightly more expensive and will take a little longer to acquire. However, this type of certificate is recommended for larger sites that handle user data and purchasing.
Extended Validation (EV)
This is the most secure option but also the most costly and time-consuming. Acquiring extended validation requires a thorough vetting process and is usually more expensive than the previous option. This also means that it takes the longest to be approved. This type of certificate is geared towards very large, high-traffic sites, such as e-commerce businesses and official government sites.
As we pointed out earlier, the type of SSL/TLS certificate you need is entirely dependent on your site’s purpose and requirements. We recommend that you read more about the different certificate levels to make sure that you’re picking the right option.
Where to Get an SSL/TLS Certificate for Your Website
At this point, you know that you need an SSL/TLS certificate. What’s more, you have an idea of the type of certificate that your site requires. Now, you just need to purchase one.
You can get an SSL/TLS certificate from a CA, such as GlobalSign. In addition, some hosting providers offer them as free extras or bundled in with their paid plans.
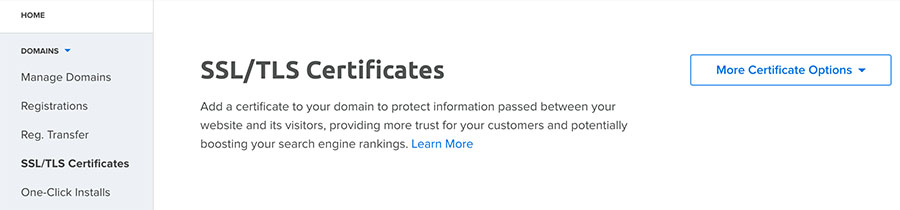
At DreamHost, SSL/TLS certificates can be easily added to your site from your control panel. Let’s take a look at the available options:
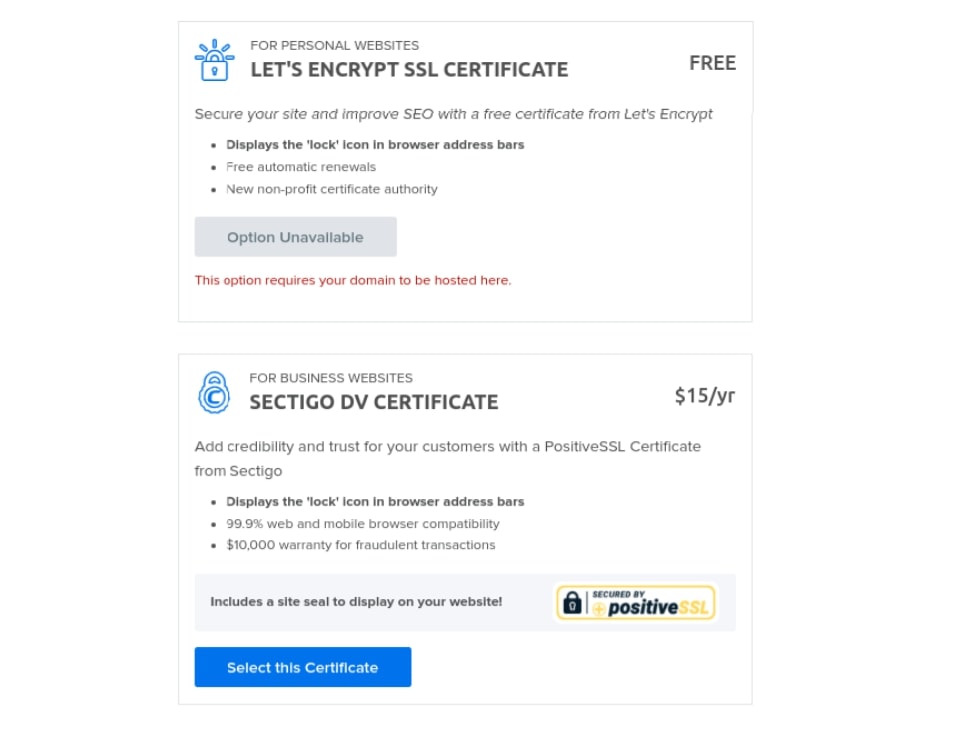
Sectigo-verified SSL
This is a DV certificate (previously known as Comodo) that costs $15 per year. It will ensure that your site appears in browsers as fully secured. This makes it the best option for commercial sites or sites that handle sensitive data.
Let’s Encrypt SSL/TLS
This is yet another free DV certificate, but one that is more secure than the previous option. The Let’s Encrypt certificate is almost as secure as Sectigo. As such, it’s ideal for smaller sites that don’t handle much personal data, such as blogs.
If you already have a DreamHost account, you can acquire one of these certificates by navigating to Websites > Secure Certificates in your control panel. Here, you’ll see all of your domains and the available SSL/TLS options:
Click on the Add button next to your domain name. This will take you to a screen where you’ll be able to choose between a free Let’s Encrypt SSL Certificate or a paid Sectigo DV Certificate.
When you’ve decided which option is best for your site, click on Select this Certificate:
Your DreamHost website will now be protected by SSL/TLS. Please allow 15 minutes for the changes to be pushed to the server.
However, you might be wondering: what if I want to use an SSL/TLS certificate I’ve already purchased elsewhere? In the next section, we’ll show you how to install a certificate that was purchased from a third party.
How to Install an SSL/TLS Certificate on Your WordPress Website (2 Options)
If you’ve bought an SSL/TLS certificate from an external CA, you’ll need to connect it to your site and install it. The process can vary depending on your site, your web host, and the type of certificate you’ve chosen.
However, there are two basic methods for installing an SSL/TLS certificate: using a plugin and your hosting control panel. Let’s take a closer look at each method.
Option 1: Install the Really Simple SSL Plugin
One of the easiest ways to add an SSL/TLS certificate to your site is to use a plugin. Really Simple SSL is a tool that lives up to its name:
The tool is free to download and install, though a premium version is available. It’s also incredibly easy to use, with a simple configuration process and a user-friendly interface.
The plugin will perform the entire installation and activation process for you. All you need is an SSL/TLS certificate, and the tool handles pretty much everything else.
Start by installing and activating Really Simple SSL on your WordPress site. Then, a message will appear in your dashboard with some additional information about what you need to do before activating SSL/TLS. Make sure you complete all of these steps before you proceed:
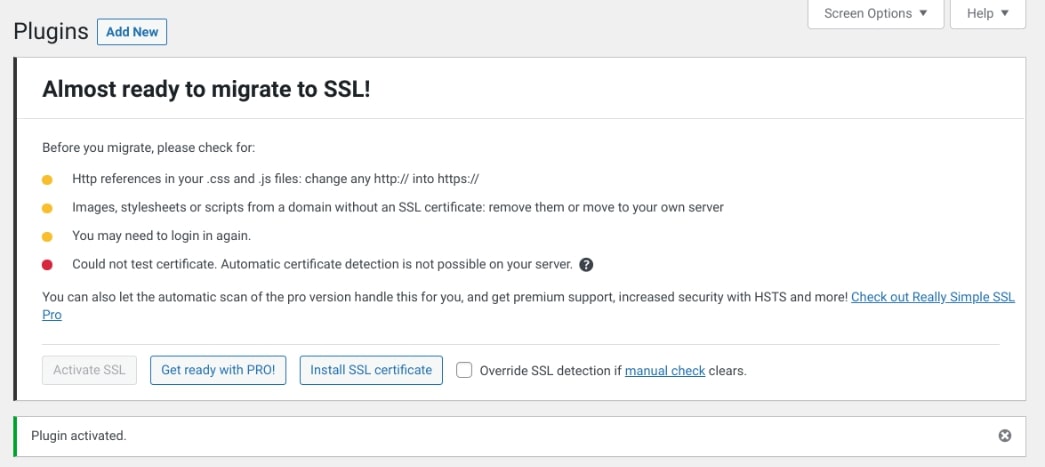
If your site already has a connected SSL/TLS certificate, you will see the option Go ahead, activate SSL! If you click on that button, the plugin will install and activate your certificate.
However, if you haven’t added SSL/TLS via your web host, you’ll see a message informing you of that fact. You will need to return to your host’s dashboard or control panel, and follow their specific guidelines for adding your certificate.
Once you’ve done that, you can return to your WordPress dashboard and activate your SSL/TLS certificate:

During the installation process, the tool will keep you updated on the status. You can view some tasks that you may still need to tend to as well as refresh the process at any point.
Option 2: Use the DreamHost Control Panel
We’ve already shown you how DreamHost makes it easy to purchase and activate an SSL/TLS certificate from your control panel. You can use a similar process to add a third-party certificate.
First, you’ll need to log in to your account and navigate to Websites > Secure Certificates. Then, select the Import a Certificate tab. On this screen, you’ll be able to install a third-party SSL/TLS certificate on your site:

You will need to add the SSL/TLS certificate, along with your private key and the certificate signing request. If you have an intermediate certificate, you will also need to add that information here. It’s important that these all come from the same CA and were purchased simultaneously, otherwise, they will not be compatible.
Also, you’ll want to make sure that you include everything when you add in this information. For example, when you paste in your certificate, you should also include the lines —–BEGIN CERTIFICATE—– and —–END CERTIFICATE—– at the beginning and end respectively.
When you have added all the necessary details, click on Save changes. If the SSL/TLS certificate is valid and you’ve entered everything correctly, it will now be active on your site.
You can test to make sure that the process worked correctly by using the method we showed you earlier. Simply access your site in a browser and ensure that it uses https:// and has a green padlock next to the URL (if relevant). If it does, you’ve successfully added SSL/TLS to your WordPress website!
Are There Risks in Switching Your Site to HTTPS?
The risks of switching your site from HTTP to HTTPS are minimal, and the benefits far outweigh any potential drawbacks. The only real risk is that your site could be temporarily unavailable during the process. However, this is usually a very minor issue that can be resolved quickly.
That said, there are some things to be aware of when moving from HTTP to HTTPS. The best way to ensure a safe, smooth transition is to plan ahead.
Before you begin the migration process, it’s important to make sure that the SSL certificate you purchased works. You can do that by using the SSL Labs testing tool:
You’ll also want to create a detailed migration and redirect plan. A 301 redirect should be placed on each HTTP URL pointing to its HTTPS equivalent.
There are also a handful of Search Engine Optimization (SEO) factors to consider. You’ll want to make sure your XML sitemap is updated and includes only your HTTPS URLs. It’s also important to update all of your internal links, as well as any external links pointing to your site that you have control over.
We also recommend using the help of a developer or WordPress expert to assist in the migration process. After the migration is complete, check to ensure that your HTTPS version is connected to your Google Analytics and Search Console accounts.
The Future of Website Security
As the internet continues to evolve, so does the need for website security. In the past, security updates were released on an as-needed basis, typically in response to a specific threat or vulnerability that had been discovered.
However, today’s website security climate is much different. With the rise of sophisticated attacks and new threats appearing every day, website owners can no longer afford to wait until something goes wrong to take action.
Instead, they need to be proactive about website security and always be on the lookout for new ways to protect their online assets. This means staying up to date on the latest security trends and keeping an eye out for new updates that can help improve your website’s defenses.
The future of website security is always evolving, and keeping up with the latest trends and technologies can be a challenge. In the coming years, we expect to see a number of major security updates that could have a significant impact on the way website owners protect their sites. Let’s take a look at some emerging trends that we think will play a role in the future of website security.
Default Switch to HTTPS
One of the biggest changes in store for website security is the switch to HTTPS by default. This change has been in the works for several years, but it’s finally starting to become a reality.
Google has been pushing for this change since 2014, and it has even started giving preference to HTTPS sites in their search results. Therefore, all websites should make the switch to HTTPS if they want to stay ahead of the curve. Not only will it help with SEO, but it will also make your site more secure for your users.
New Domain Name Security Features
To help protect against domain name hijacking, the Internet Corporation for Assigned Names and Numbers (ICANN) introduced a new set of security features for all domains registered after January 1, 2018. These features include Domain Lock, which prevents unauthorized changes to DNS records, and Registrar Lock, which prevents unauthorized transfer of a domain to another registrar.
Currently, these security measures are not mandatory. However, they’ll likely become more popular because they could go a long way in protecting your domain name from being hijacked.
Another big change that’s coming in 2022 is the introduction of the Domain Name System Security Extensions (DNSSEC). This new security protocol will help protect DNS servers from being exploited and will make it harder for attackers to spoof DNS records.
DNSSEC is already being used by some of the biggest companies in the world, including Google, Facebook, and Netflix. It’s only a matter of time before it becomes a requirement for all websites.
More Sophisticated Attacks
As hackers become more clever, we can expect to see more sophisticated attacks. This could include everything from targeted phishing attacks to large-scale Distributed Denial-of-Service (DDoS) attacks. Website owners need to be prepared for these threats and have a recovery plan in place.
Increased Regulation
With the introduction of General Data Protection Regulation (GDPR) and other data privacy regulations, we can expect to see increased scrutiny on how website owners collect and use personal data. This could lead to more stringent requirements for websites, as well as greater penalties for those who fail to comply with the new regulations.
Greater Awareness of Security Risks
As website security becomes more of a mainstream concern, we can expect to see more people taking steps to protect their online information. This could include everything from using strong passwords to investing in website security products and services. By staying up to date on the latest website security trends, you can help keep your site safe from attack.
Secure Your WordPress Website
Keeping your website secure is an ever-present consideration, and it’s equally important to ensure that your users know they can trust you. By adding an SSL/TLS certificate to your site and forcing secure connections through HTTPS, you can protect yourself and your users, while making sure everybody knows your site is safe to use.
Fortunately, there are several different types of SSL/TLS certificates available. Finding a certificate that matches your requirements shouldn’t be difficult once you know what you need. You may even be able to get one through your web host. What’s more, installing an SSL/TLS certificate is also a breeze, thanks to WordPress and DreamHost.
At DreamHost, our plans come with a variety of Managed Security features. Check them out today to learn more about how DreamHost can streamline the security of your site!
Take Charge with Flexible VPS Hosting
Here’s how DreamHost’s VPS offering stands apart: managed security, 24/7 customer support, an intuitive panel, scalable RAM, unlimited bandwidth, unlimited hosting domains, and SSD storage.