DNS Server Not Responding Error? Here’s How To Fix It (13 Ways)

Unlike many problems that affect websites, the DNS Server Not Responding error seems pretty descriptive. Clearly, some distant server isn’t playing ball and it’s blocking you from visiting a particular website.
But what exactly is a DNS server and why is it misbehaving? In a strange way, the information provided by the error message is only useful if you already know what it means.
To help you resolve this issue, we decided to take a deeper look at the DNS Server Not Responding error, and all the possible causes. Keep reading to find the answers you’re looking for!
What Does The “DNS Server Not Responding” Error Mean?
To understand this error, we first need to take a quick look at DNS, or domain name system.
DNS
The Domain Name System (DNS) protocol keeps records of which domain names correspond to specific IP addresses. DNS enables you to browse the web by typing in regular URLs instead of IP addresses.
Read MoreWhenever you ask your browser to connect to a website, a DNS server has to convert the domain name (e.g., mysite.com) to the numeric IP address (four numbers separated by three periods, for example, 127.0.0.1) of the hosting server. This is where the site actually lives; the domain name is simply a pretty title that is easier for humans to remember.
DNS Server Not Responding error occurs when, for some reason, your browser can’t make contact with the server that handles the domain name to IP address translation.
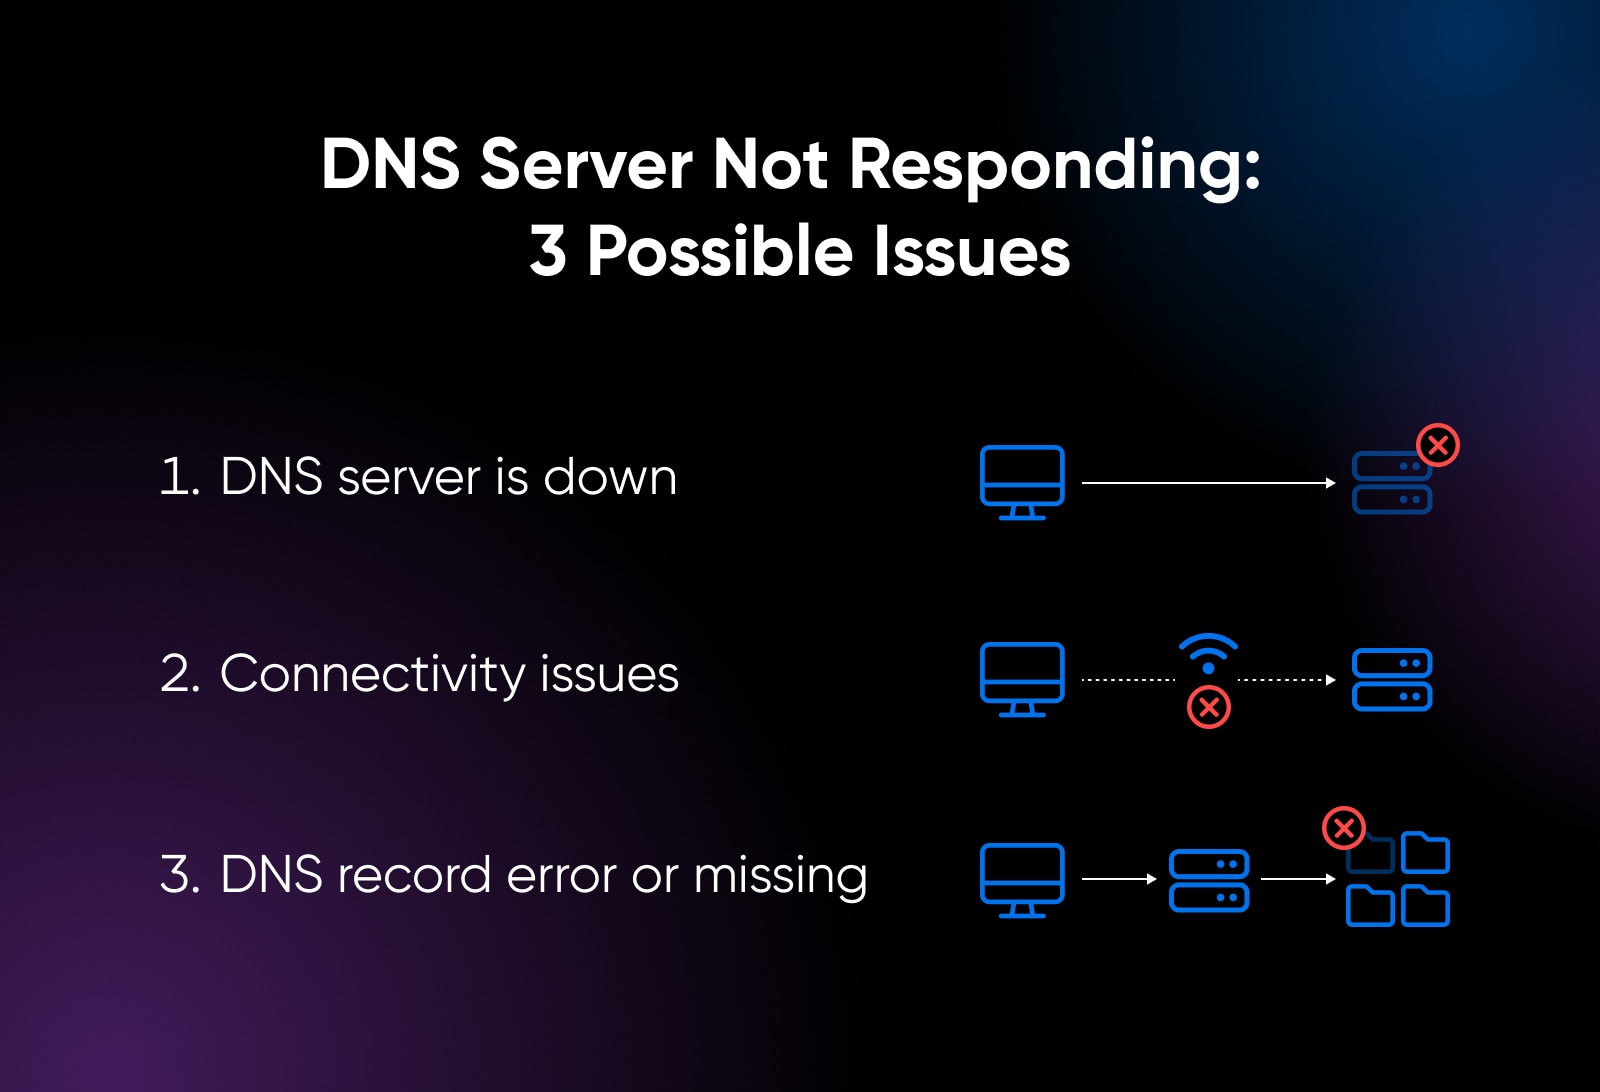
There are three underlying reasons why this could be happening:
- The DNS server is down or unreachable: There is something wrong with the server itself, or its network connection.
- You have connectivity issues: Often due to an outage somewhere between you and the server, including network issues.
- The DNS record for the domain name is incorrect or missing: This means the DNS server doesn’t know which IP address to point the domain name to.
In order to fix the error, we need to work through a checklist that covers all three possible causes.
Fixing The DNS Server Not Responding Error
If the DNS Server Not Responding error appears only on your site, it might be because your domain name isn’t configured correctly.
- Make sure your domain name hasn’t expired.
- Check that you have an “A record” and it contains no typos.
- If you made changes recently, give them time to propagate.
If none of this helps, or you see the error on other websites, here are all the ways you can fix a DNS Server Not Responding error:
1. Try Using A Different Browser
Strictly speaking, switching to another browser won’t fix DNS issues. But it can reveal what has gone wrong.
Every browser maintains a cache, where content is stored temporarily for quick access. The problem is that your browser cache might have stored the wrong DNS records. If this happens, you will get the same error message whenever you try to revisit the same page.
Cache
A cache is a temporary data storage layer that is designed to improve data access speeds by reducing the time needed to read and write data from a permanent data storage location.
Read MoreBy moving away from your default browser, you will be using a different cache, and each browser has its own default DNS servers. In addition, you will bypass other issues like extensions that block connections.
2. Check The Site From A Different Device
If you’re still seeing an error on a particular website after changing your browser, try swapping to a different device. This will ensure that some other unexpected issue in your local system isn’t causing the problem.
If you don’t have access to another desktop computer, simply pull out your phone and try to visit the page in question. If this doesn’t fix the error, it’s also worth connecting to a different network or switching to data.
3. Restart Your Computer
Another way to deal with cache-related problems is by restarting your device. This will flush all DNS records from your machine, so your device will have to perform a live DNS lookup when you visit the problematic page.
Restarting your device also renews its IP address and clears the DNS request queue, which can be enough to fix certain connectivity issues. It could be enough to clear the error.
Get Content Delivered Straight to Your Inbox
Subscribe to our blog and receive great content just like this delivered straight to your inbox.
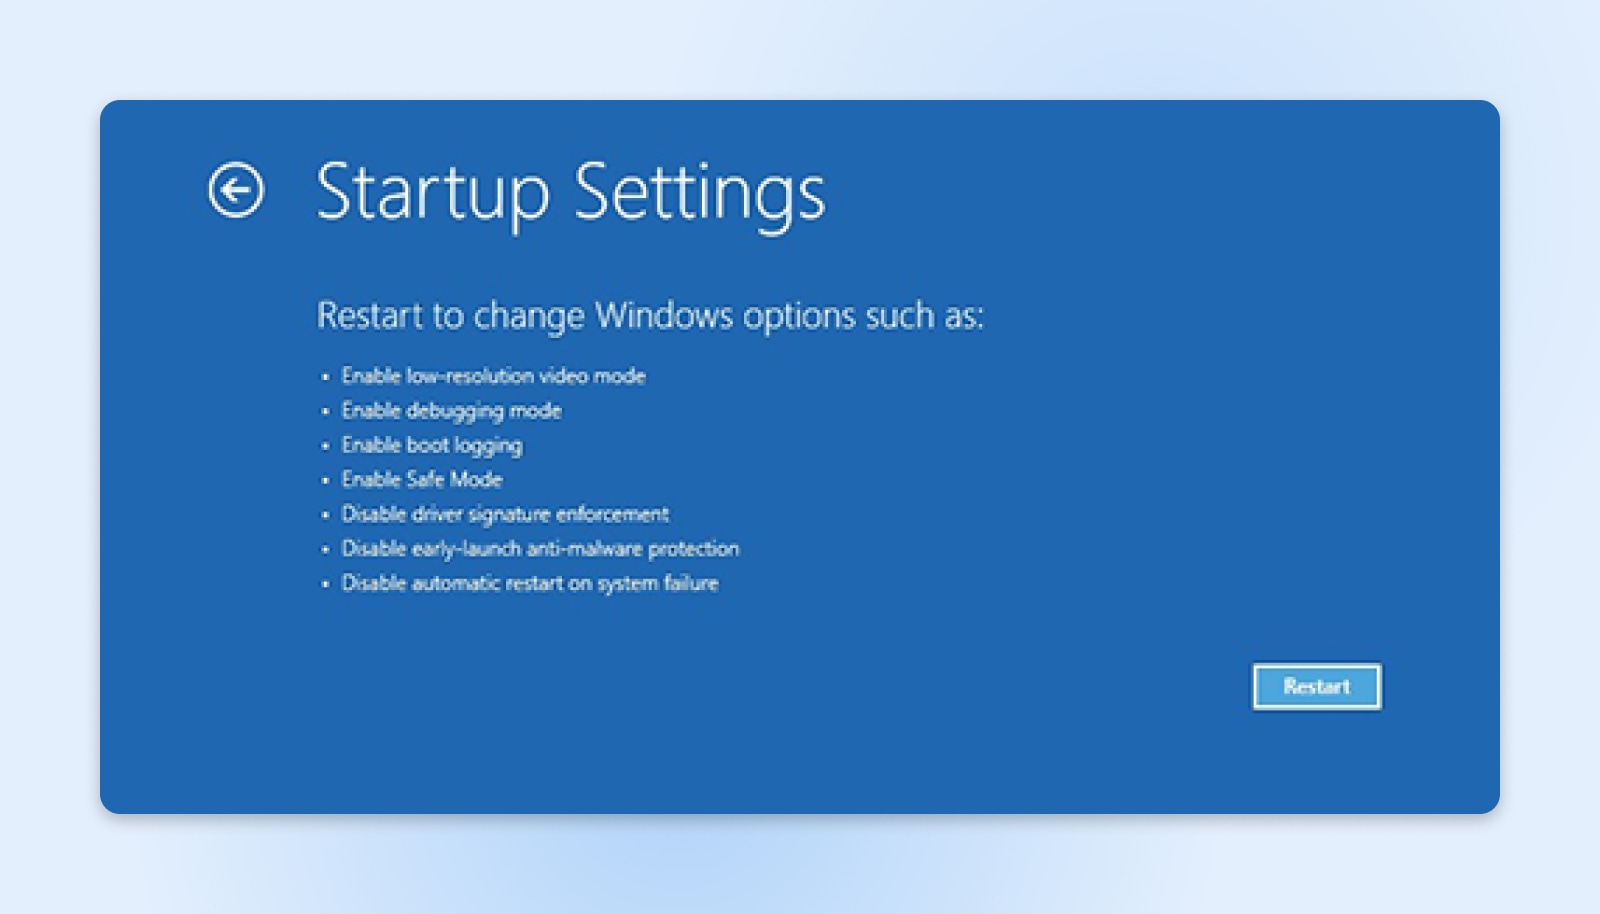
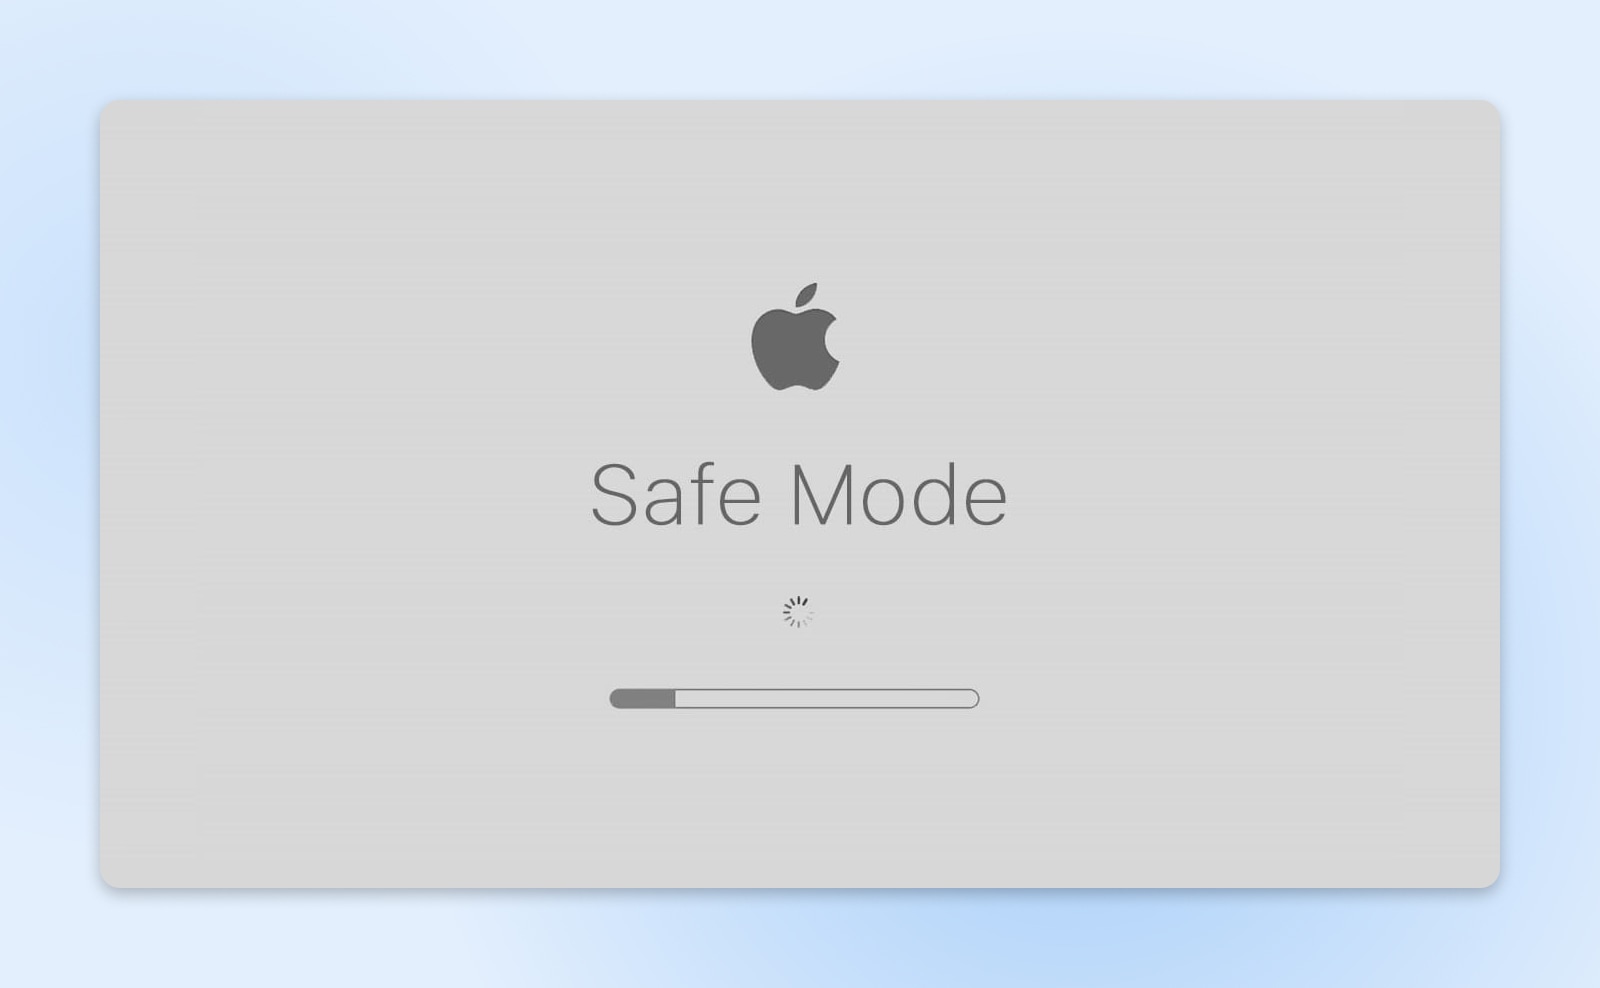
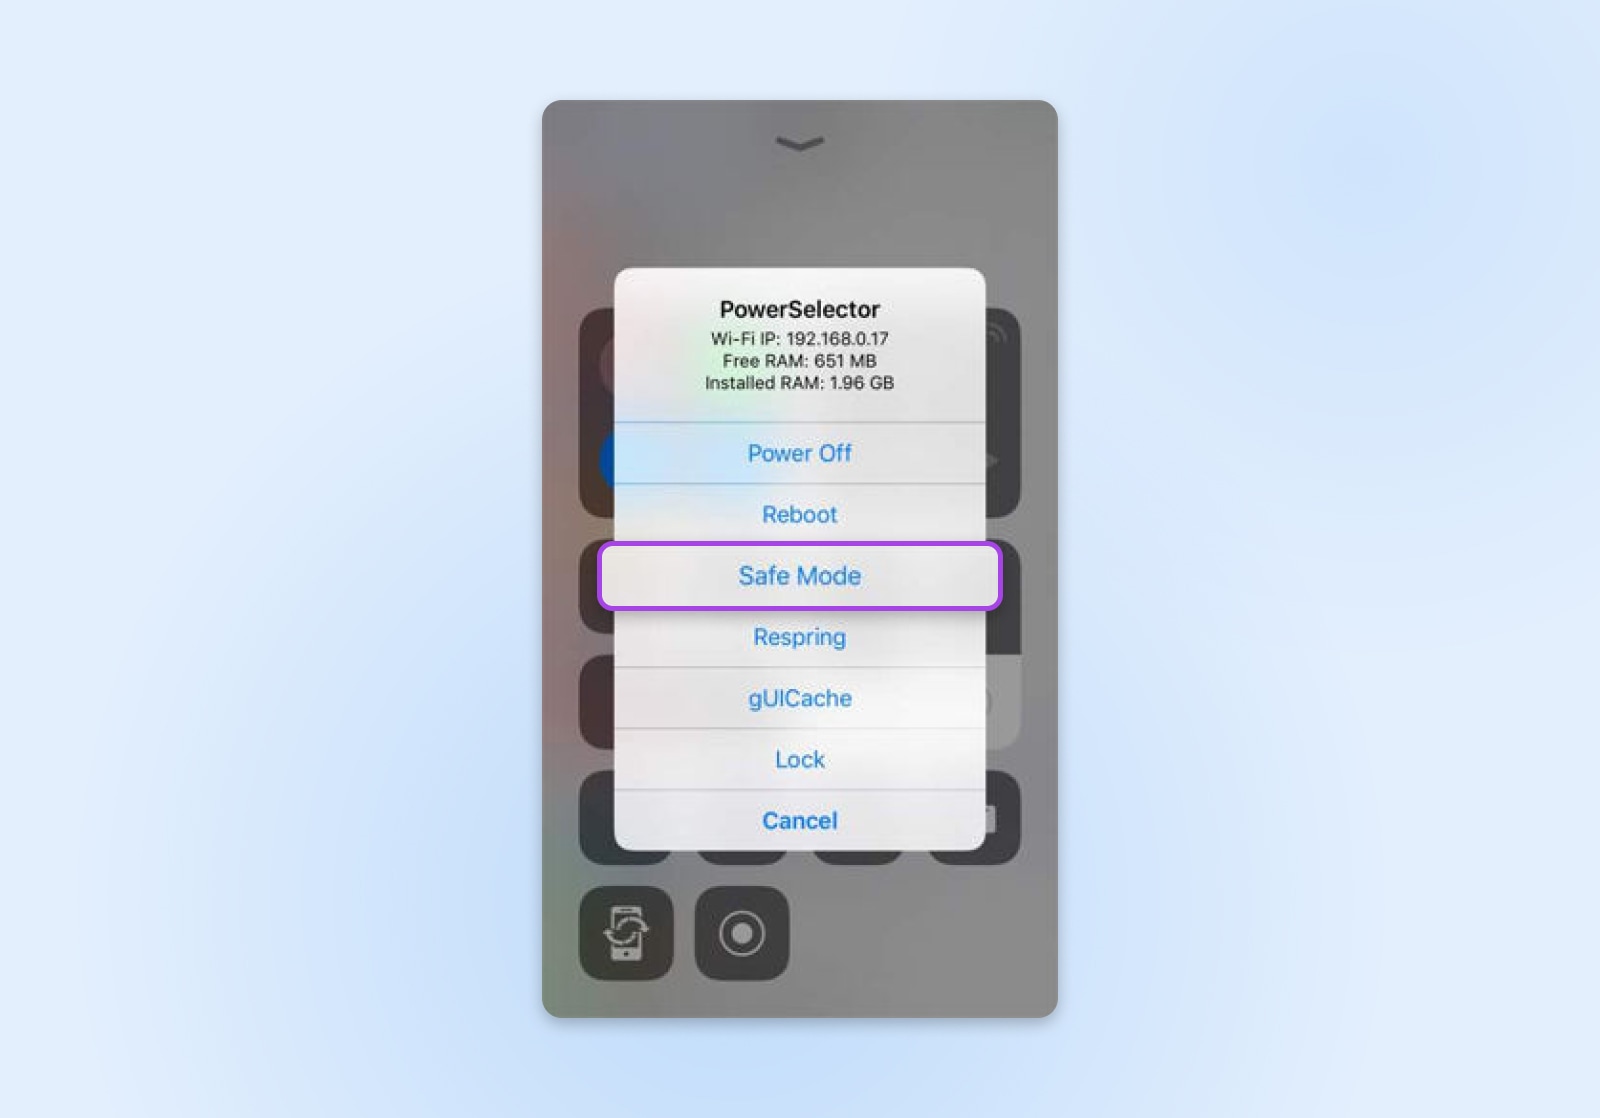
4. Restart Your Computer In Safe Mode
Sometimes, software and related drivers on your device are the cause for the blocked DNS connections. To test for this issue, it’s a good idea to boot up your device in Safe Mode:
Windows:
- On the sign-in screen, click Restart while holding Shift.
- Select Troubleshoot > Advanced options > Startup Settings > Restart.
- After restart, press 5 or F5 to start up your device in safe mode with networking.
Mac: Hold Shift as you power up.
iOS / Android: Press and hold the power button, and then tap the down volume control after the screen lights up.
In this mode, your machine will revert to default settings and only the most essential drivers. If the problem sites load normally while in Safe Mode, it means that either third-party software or drivers are causing incompatibility issues.
This is definitely bad news, because the only way to track down the precise cause is by testing your apps, one by one. That said, it’s most likely to be something like a VPN, or security software causing your headaches.
5. Turn Off Antivirus Software And/Or Your Firewall
Antivirus applications and firewalls protect your device by monitoring traffic. From time to time, these tools sometimes meddle too much with your internet connection and end up causing DNS server errors.
As such, it’s a good idea to switch off your antivirus program and/or firewall protection temporarily, to test whether they are causing the problems.
If this resolves the problem, make sure to turn your protection back on. Then, look through the settings to find anything related to DNS that may be causing your troubles. If your chosen software package includes support, it may be worth reaching out to your provider for help.
6. Turn Off Your VPN
VPNs, or virtual private networks, provide an extra layer of online privacy by routing data to your device through an encrypted tunnel. So far, so useful. The issue is, the tunnel might be bypassing your default DNS servers.
To test this idea, switch off your VPN and try to visit the page where you had the DNS server issue. If this resolves your problems, restart the VPN and take a peek at the settings. You’re looking for controls related to DNS filtering. If you need a helping hand, try contacting your VPN provider for support.
7. Flush DNS Cache
You don’t necessarily need to restart your device to flush the DNS cache. You can do it manually instead:
- Windows:
- Press Win + R and type in the “ipconfig /flushdns”.
- Then, hit Ctrl + Shift + Enter to run the command prompt.
- Mac:
- Open the Terminal, and type in “sudo dscacheutil -flushcache; sudo killall -HUP mDNSResponder”.
- Press Enter.
- Input your admin password when prompted, and press the Enter button again.
- iOS: Turn Airplane Mode on and back off again.
- Android
- In Chrome, type “chrome://net-internals/#dns” into the search box.
- Select DNS on the left, and then tap Clear host cache
By flushing your DNS cache, you will force your device to re-query the DNS server for each site you visit. This ensures you have updated mappings of domain names to IP addresses — an essential first step in network diagnostics.
8. Restart Your Router
Network connection issues are a common cause of DNS server errors. One easy way to fix this kind of problem is by restarting your internet router.
Switch it off and unplug the power cable for around 30 seconds. This should clear any corrupted DNS entries that have been stored in the router cache, and renew your connection.
At the same time, it’s worth checking that your router’s firmware is up to date. Outdated firmware can cause connectivity issues that prevent DNS lookups. In combination, these steps might fix your problem.
9. Disable IPv6
Internet protocol is the system that creates a unique IP address for every device on the internet. The current version is IPv6 (Internet Protocol Version 6), which has gradually replaced IPv4 over the past few years. It is now the default option.
However, not every network and DNS server has been updated to IPv6.
If you use this version to request a particular web page, you might only receive a DNS Server Not Responding error. Similarly, systems that are in hybrid mode can experience technical troubles in juggling both systems.
For this reason, it’s worth temporarily switching off IPv6 to see whether you can access a website via IPv4.
The exact process depends on your platform, but it usually involves:
- Visiting the network settings on your device.
- Selecting your active connection (usually Ethernet or Wi-Fi).
- Accessing the advanced options via Advanced, Properties, or i.
- Toggling IPv6 off, and saving your changes.
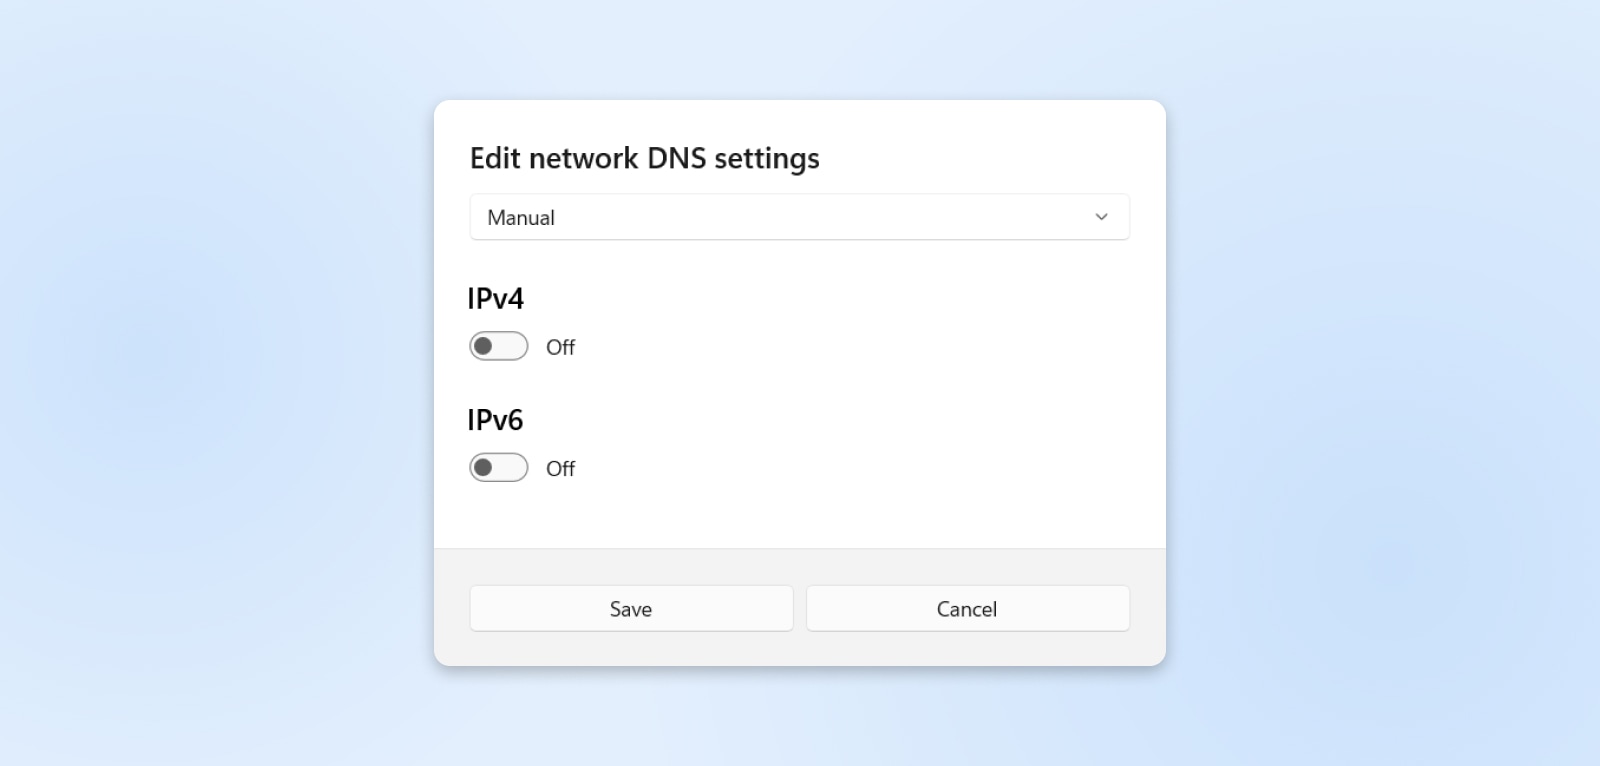
Lastly, you will need to restart your device to test whether this potential solution has worked. If you see no improvement, reverse the process to switch IPv6 back on — this can help you to maintain better performance as you move between different networks.
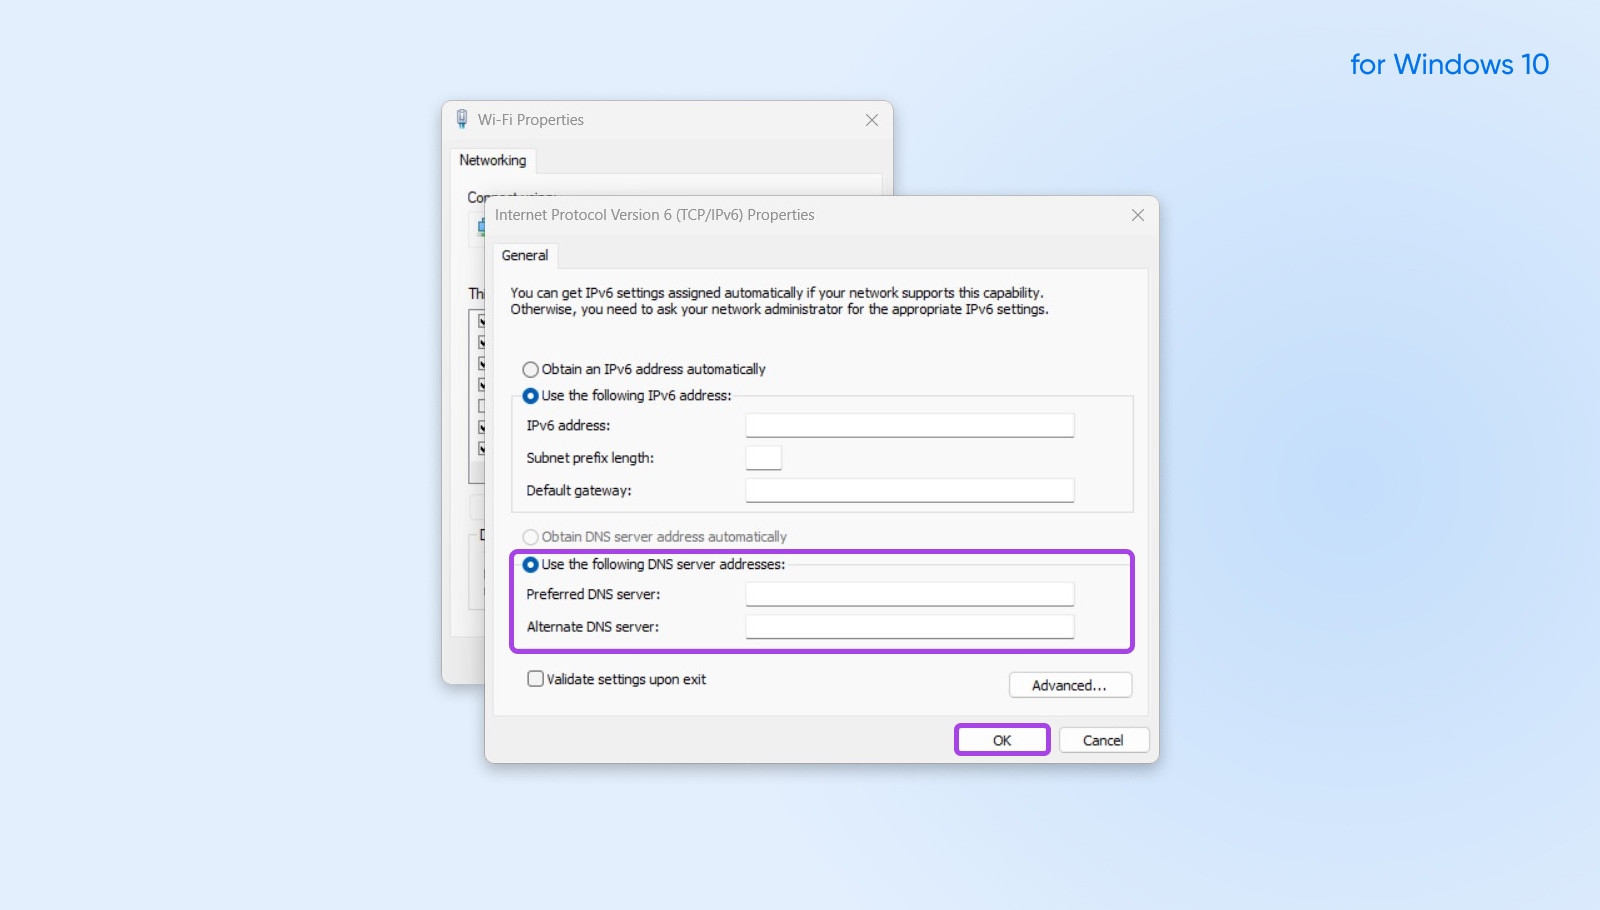
10. Change The Default DNS Server
Normally speaking, your device connects to a DNS server provided by your ISP (Internet Service Provider). If you’re having DNS issues, it might be because this server is misbehaving. The solution here is to switch to a different server.
Organizations like Google and Cloudflare provide public DNS servers that anyone can use. Some people prefer using these servers because they can speed up page loading. In other cases, people use an alternative DNS server for privacy reasons.
Some of the most popular alternate DNS providers include:
- Google: 8.8.8.8 and 8.8.4.4
- Cloudflare: 1.1.1.1 and 1.0.0.1
- OpenDNS: 208.67.222.222 and 208.67.220.220
Here’s how to switch your DNS server address.
Windows:
- Navigate to Control Panel > Network Connections > Properties.
- Under Preferred DNS server, enter the IP address of your preferred DNS server.
- Under Alternate DNS Server, put in the address of your backup server, and save your changes.
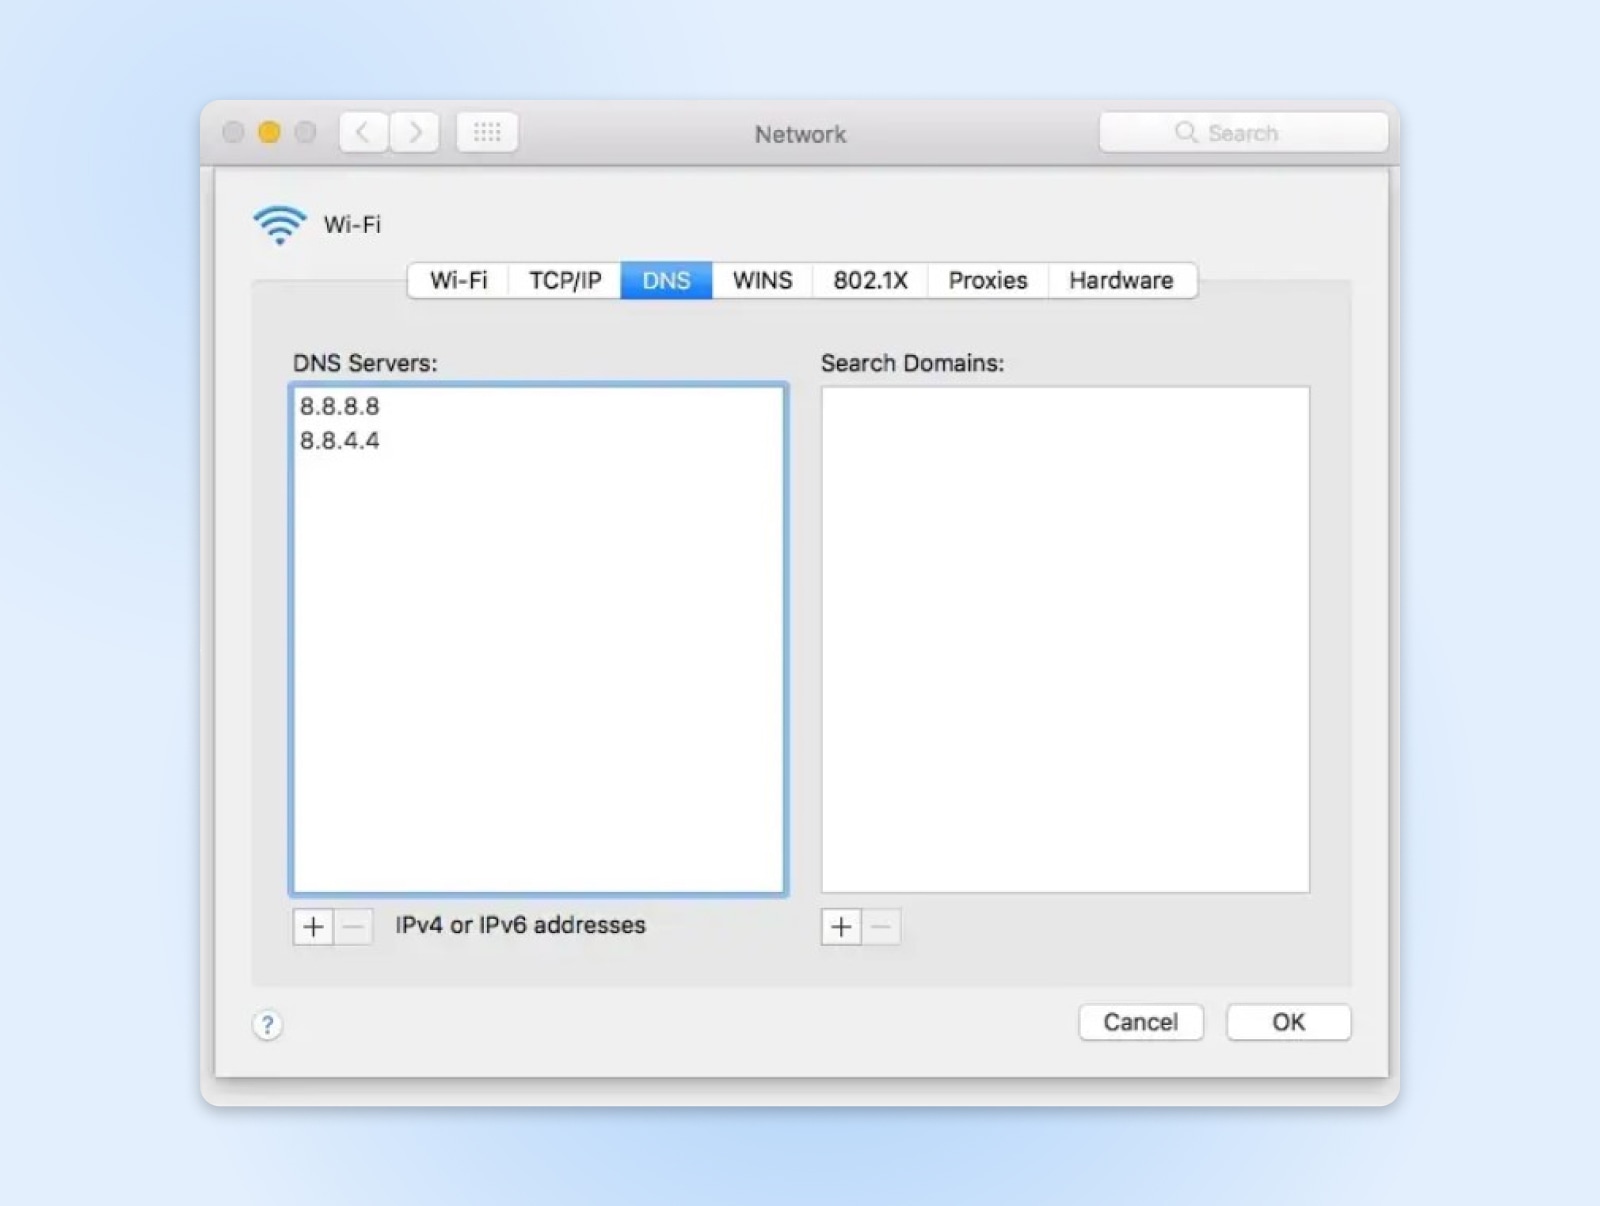
Mac:
- Navigate to System Preferences > Network and select your primary internet connection in the sidebar.
- Click Details (or Advanced on older Macs) then select DNS.
- At the bottom of the DNS servers list, click the + button and enter your new DNS address.
- Make sure to click Apply before leaving the Network screen.
iOS Mobile
- Navigate to Wi-Fi settings (they might be under Network & Internet)
- Find the DNS settings…
- On iOS, tap the i icon, then Configure DNS.
- Select Manual < Add server to update DNS.

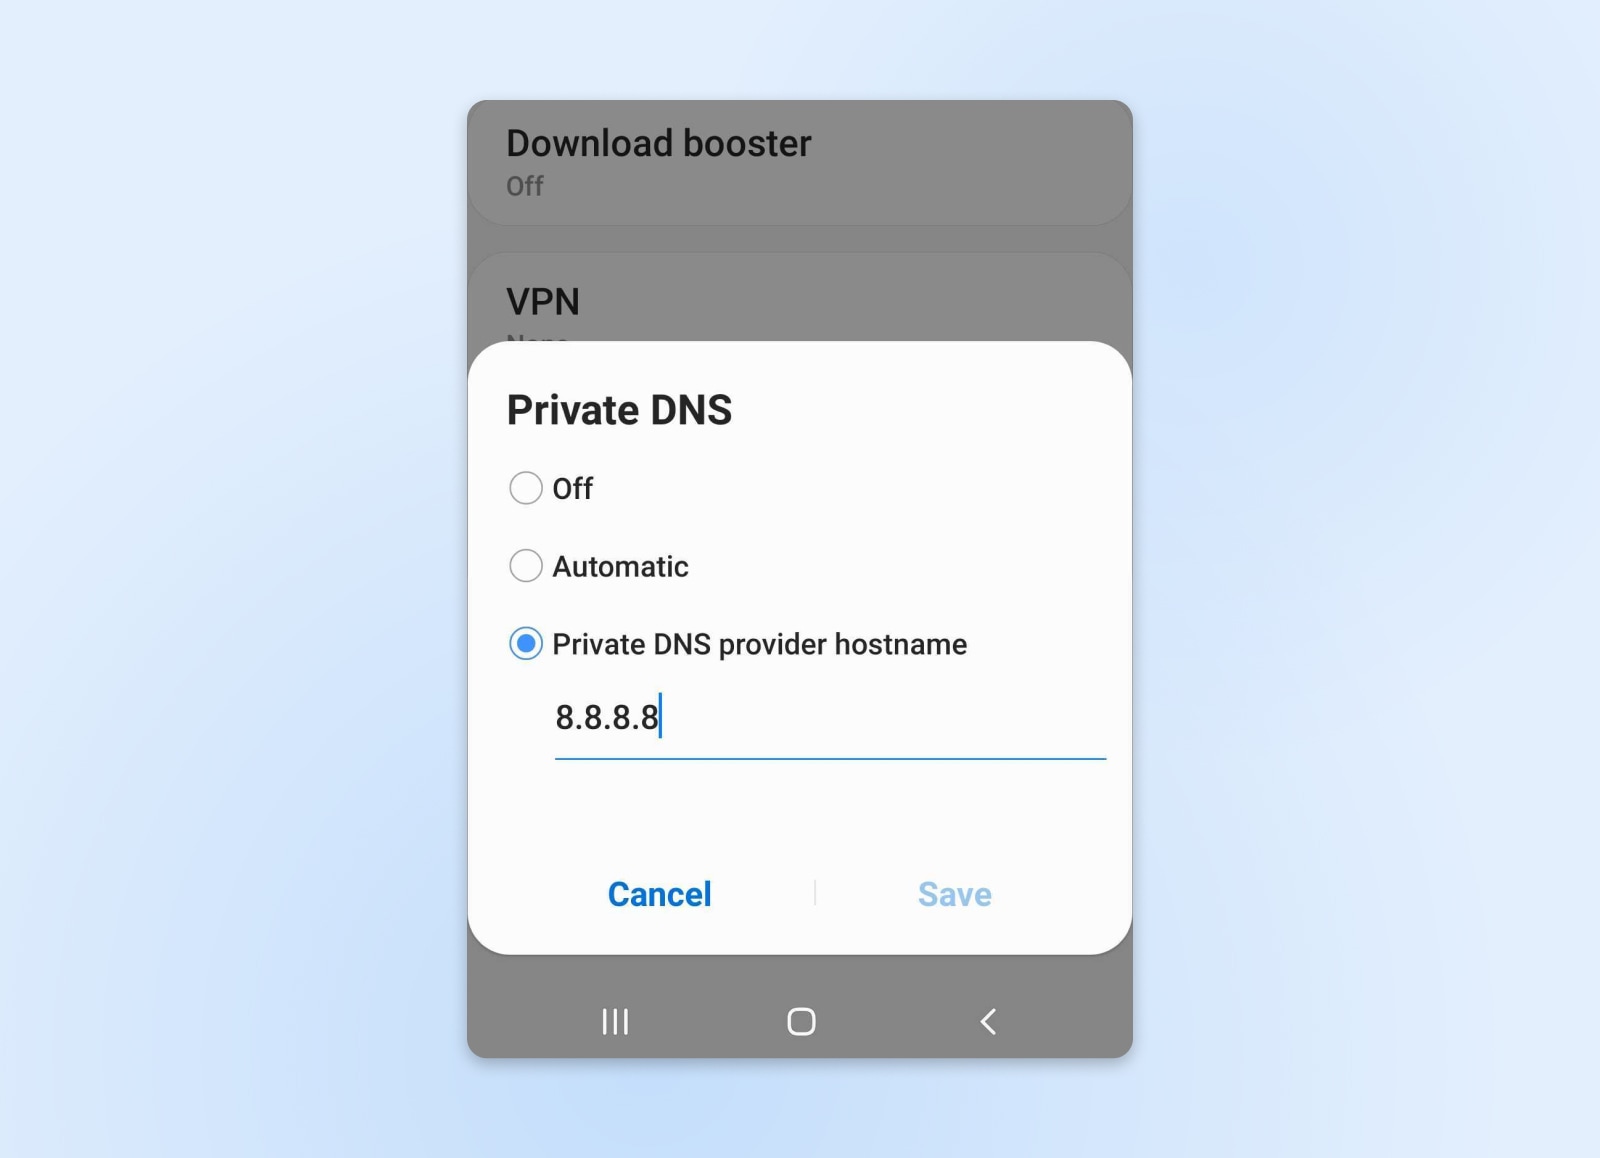
Android Mobile
- On Android, open Settings > Connections > More connection settings.
- Tap on “Private DNS” and choose “Private DNS provider hostname to change the DNS server.
Once you have finished changing your DNS server settings, restart your device before trying to access the internet. This will ensure that the new DNS settings are adopted, giving you a chance of beating those pesky errors!
11. Update Network Adapter Drivers
A network adapter driver is a piece of software that allows an operating system to communicate with a network adapter. This is the small card in your device that handles internet connections.
If the driver software isn’t regularly updated, it can start to create problems. Likewise, a driver that is corrupted, or incompatible with a new network adapter, is likely to create headaches.
One possible symptom is — you guessed it — the kind of DNS error we’re trying to fix.
Many devices update their network drivers automatically; macOS handles this chore behind the scenes. On Windows, you can take control of the adapter settings yourself:
- Visit Device Manager.
- Right-click Network Adapter.
- Select Update Drivers from the drop-down menu.
If possible, it’s a good idea to connect to the internet via an Ethernet cable when updating your drivers. The reason is simple: you’re updating the piece of hardware you need in order to download the update. Interruptions due to poor Wi-Fi signal can mess up the process.
Once you have updated your drivers successfully, restart your device and see if DNS is working properly.
12. Disable Secondary Connections
Some devices have more than one network adapter. For example, wired and wireless connections use different adapters.
In most cases, you only need to use one adapter at a time. Switching off all secondary connections is a good idea because they can cause problems with DNS requests.
To do this, visit the network settings on your device and turn off all live connections other than the one you’re using (e.g., If you’re connected via Wi-Fi, disable the Ethernet connection.)
It’s also worth checking whether you have a virtual network adapter running. This is a digital service that allows multiple connections via the same physical adapter. It’s a feature used by VPNs, allowing you to tunnel some traffic through the private network, and some through a regular internet connection.
To make sure a misbehaving virtual network adapter isn’t causing your problems:
- Windows:
- Open Control Panel > Network Connections.
- Right-click on the virtual adapter you want to switch off, and select Disable.
- Confirm you want to disable the adapter. This will take it offline.
- Mac:
- Open System Preferences > Network.
- Select the virtual adapter in the left sidebar, and click the gear icon.
- Select Make Service Inactive to disable the adapter.
- Mobile:
- Find the VPN settings on your device.
- Tap the i or gear icon.
- Switch off the adapter.
Once again, try to reload the malfunctioning page to see if the DNS error message has cleared.
13. Disable Peer-To-Peer Feature (Windows)
No luck? Don’t worry, there is one more potential fix you can try.
Windows has a peer-to-peer feature, which helps to reduce the amount of bandwidth needed while downloading updates. Rather than forcing your device to swallow all the data in one big lump, this option splits updates into individual pieces. The PC that receives these pieces can then share them with others on the same network.
This is obviously a useful feature. But as you might have guessed already, Windows P2P can interfere with the DNS lookup process. Switching it off can help you to diagnose errors:
- Navigate to Settings > Windows Update.
- Next, click on Advanced Options > Delivery Optimization.
- Toggle the switch labeled Allow downloads from other PCs.

You will then need to restart your computer to test, once again, whether the DNS error has cleared. Fingers crossed!
Frequently Asked Questions
Still have questions? You’ve come to the right place. Here’s a little extra detail on fixing your DNS settings, and a closer look at why failures happen:
How Do You Reset Your DNS Server?
After following the various troubleshooting steps above, you may decide that you want to go back to the domain name servers you originally had.
To achieve this, simply retrace the exact steps mentioned in #10 — but this time, select your current DNS servers and press the little minus button to remove them. After a restart, your device should then revert to the default ISP DNS servers.
What Causes A DNS Failure?
In simple terms, a DNS failure happens when your browser cannot convert a domain name to an IP address. However, there can be many different underlying causes.
The DNS process offers access to over 1 billion internet hosts. That’s one mighty “phone book.” So, it’s almost inevitable that the system will have some flaws.
Most DNS problems that people encounter are caused by issues with internet access or software on their device. Actual failures are most commonly caused by server outages or incorrectly configured domain names.
Set Up Your Site Correctly With DreamHost
If you want to avoid seeing DNS errors pop up on your website, you might want to switch to DreamHost.
Our hosting panel makes it really easy to configure your site correctly and manage all your domain names on a single page. If you ever get stuck, our Technical Support team is available 24/7 to provide help — and that’s on every single plan.
Sounds good? Sign up today to give it a try for yourself!
Get Content Delivered Straight to Your Inbox
Subscribe to our blog and receive great content just like this delivered straight to your inbox.