Why It’s a Good Idea to Change Your WordPress Login URL (& How to Do It)
A strong, unique password can help prevent unauthorized access to your WordPress website. However, attackers have clever ways of getting around this. Therefore, it isn’t always enough to properly protect your site against attacks.
Fortunately, you can reduce the risk of hackers getting into your site by moving your WordPress login page to a new URL. This can put you in a better position to defend against hacks and brute-force attacks.
This article will take a closer look at why you should consider changing your WordPress login URL. Then, we’ll show you how to find your login URL and modify it using two different methods. Let’s get started!
Why It’s a Good Idea to Change Your WordPress Login URL
Since WordPress doesn’t hide your login page, any user can find it as long as they know how WordPress structures its URLs. The default structure for a login page looks something like this:
https://example.com/wp-login.php
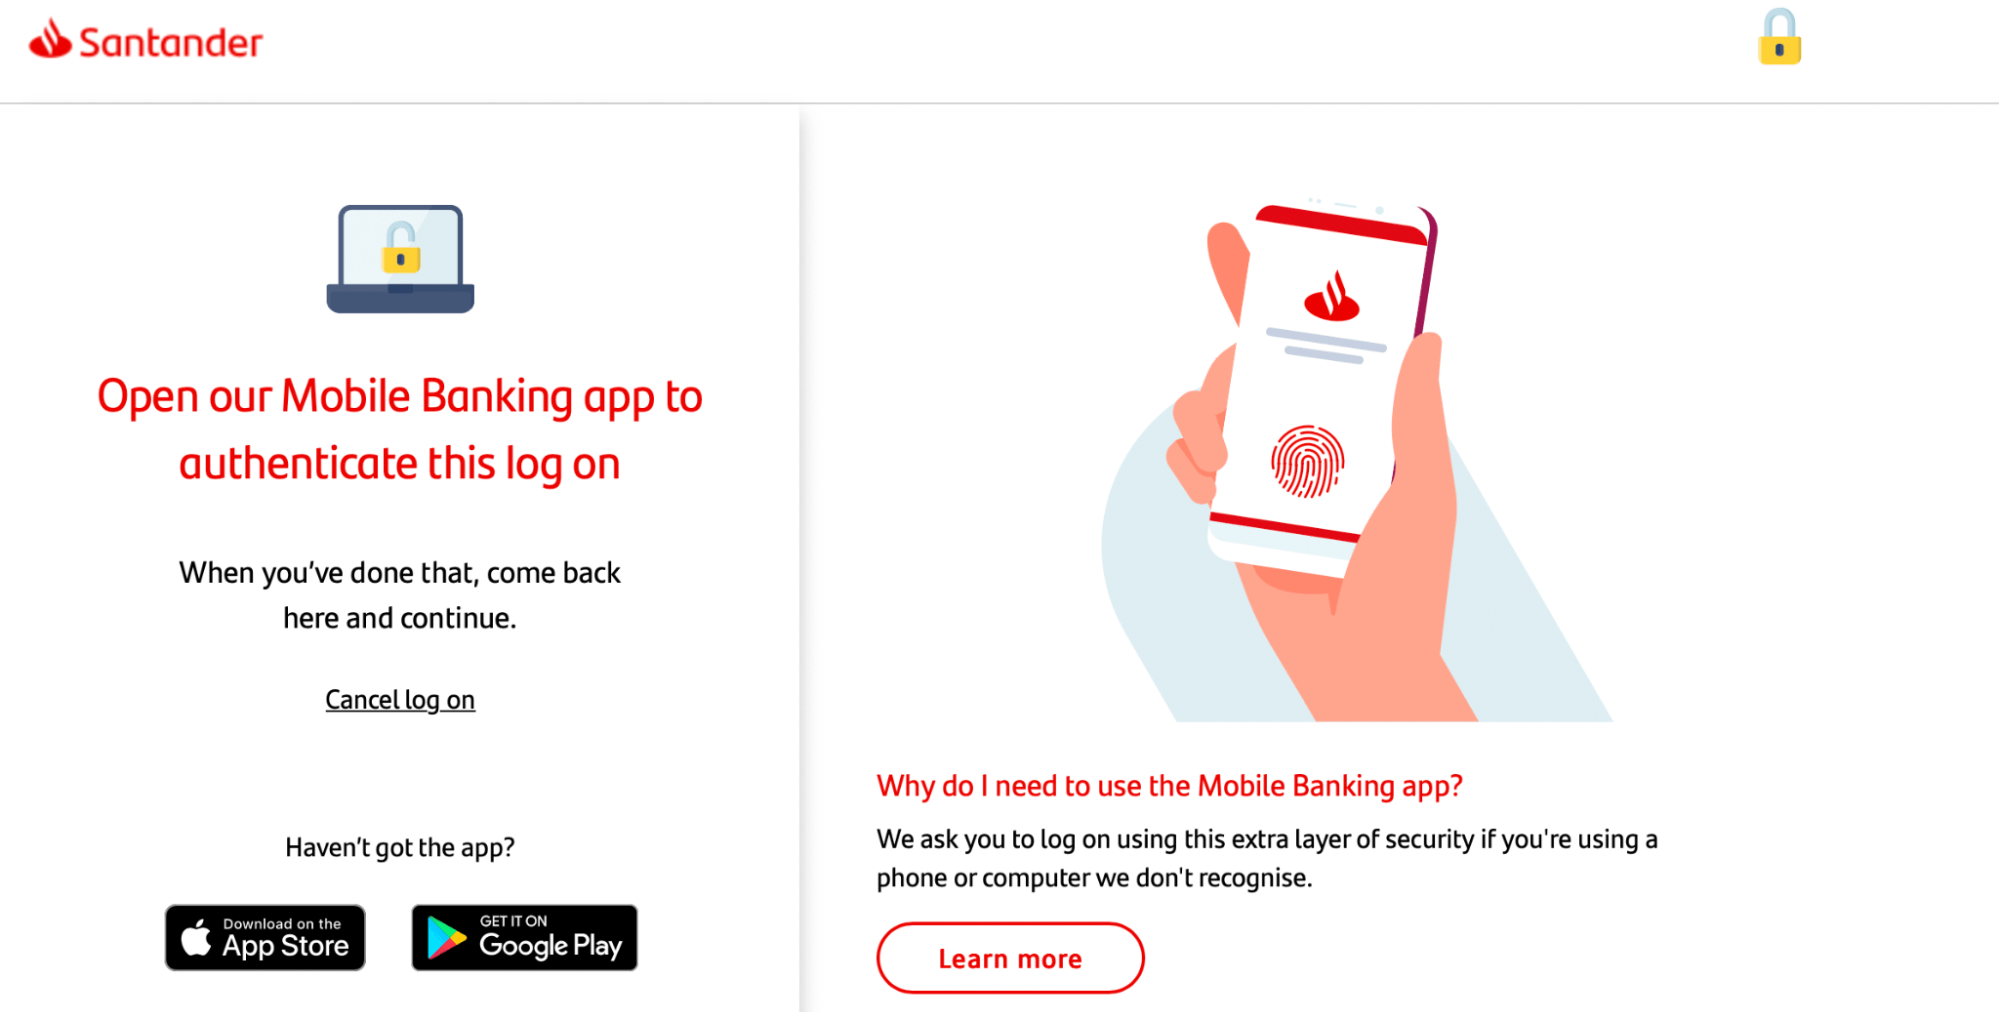
This means when a user plugs in your website name into the URL structure above, they should see a page in their browser prompting them to log in to the back end of your website:
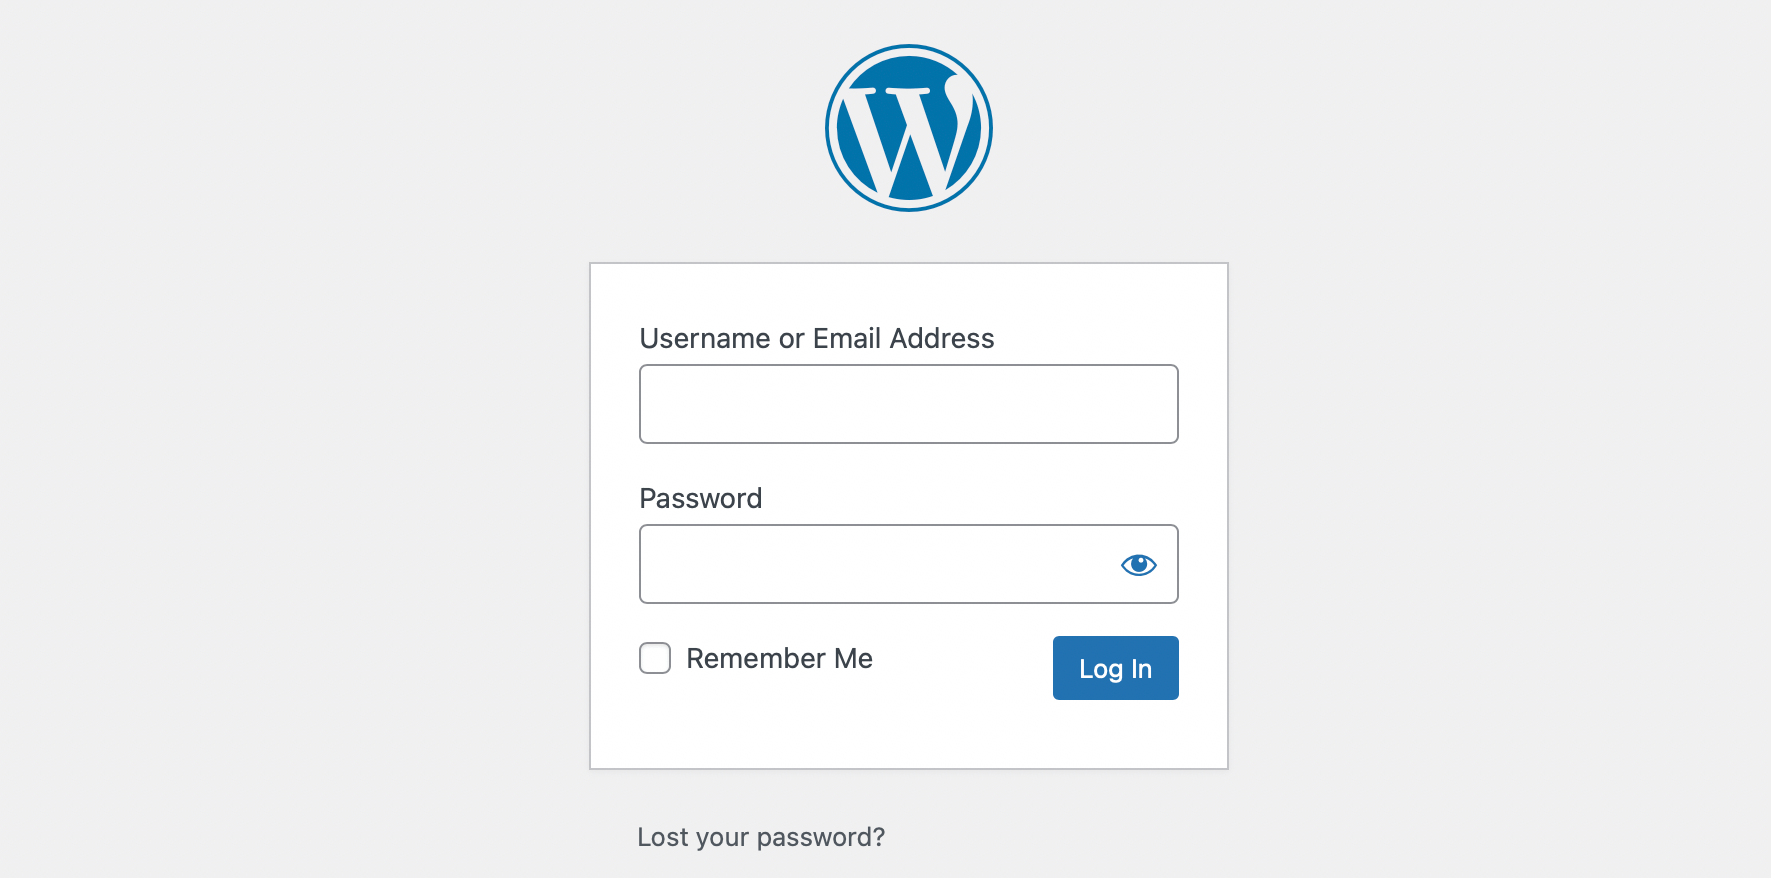
Of course, users will lack the credentials to gain access to your site.
For simplicity’s sake, many people prefer to stick with this default wp-login structure for signing into WordPress. However, by leaving this as it is, you’re actually handing over half of your login credentials to attackers.
This is especially risky if your password is common, weak, and easy to guess. In a nutshell, this is an unnecessary vulnerability that’s easy to resolve.
You can secure your login page more thoroughly by changing your WordPress login URL. As a result, you can prevent unauthorized access to your site and reduce the risk of brute-force attacks.
How to Find Your WordPress Login URL
As we mentioned in the previous section, WordPress uses a standard sign-in link structure that looks something like this:
https://example.com/wp-login.php
So, all you have to do is add the suffix to your domain, and you should land on your login page. You can also find your login page by trying to access your WordPress dashboard while logged out. Simply enter “yourwebsite.com/wp-admin” into the search bar and you’ll land on the same login page.
However, keep in mind that some web hosts change your WordPress login page automatically for security reasons. Therefore, you might already have a custom login URL. We’ll show you how to find this in the next section.
How to Find a Custom WordPress Login URL
If your web host has changed your login URL, you can usually retrieve it from an email or locate it within your control panel. Some hosts even include one-click access links to the WordPress admin dashboard, which can be useful.
However, if you can’t identify your custom login URL using one of those options, you can locate it manually. All you’ll need to do is connect to your site using SFTP.
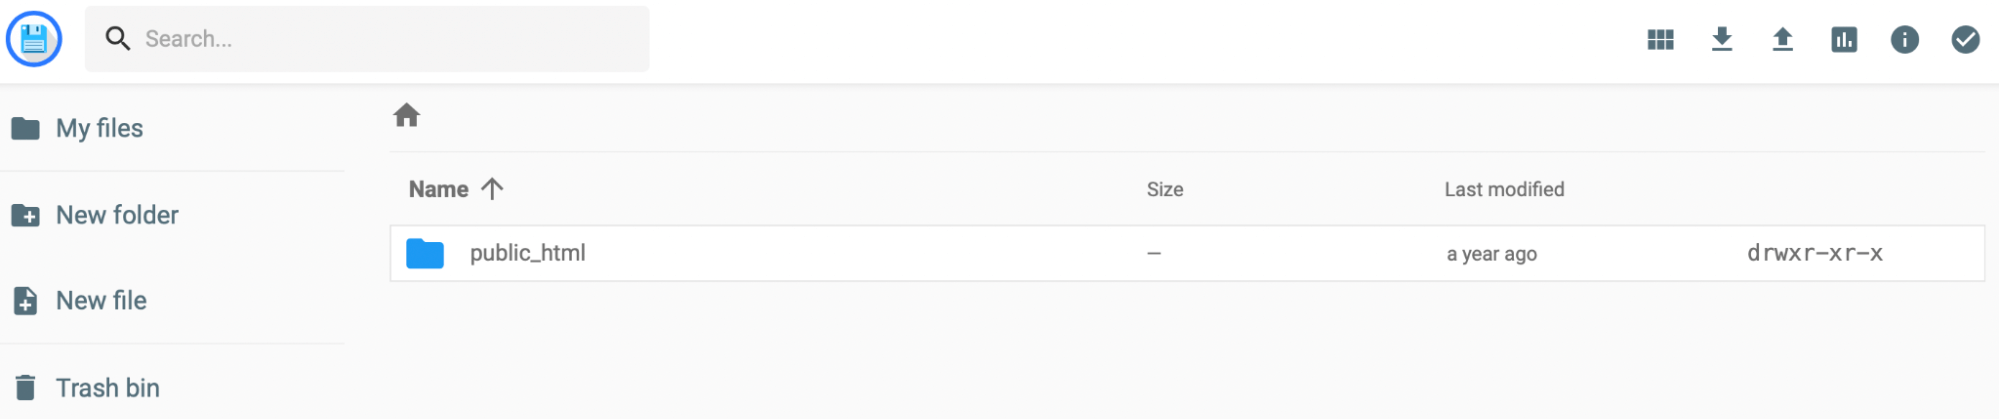
You can use a client like FileZilla. Keep in mind that you’ll need your FTP credentials, which you can get from your web host. Then, open the root folder that contains the login link. This folder is usually labeled public_html:
Find and open the wp-login.php file, keeping an eye out for the string that reads site_url. This will lead to a line of code that specifies your custom login URL.
How to Change Your WordPress Login URL (2 Ways)
Now that you know where to find your WordPress login URL let’s take a look at two easy ways you can change it.
Method 1: Change Your WordPress Login URL with a Plugin
The easiest way to change your WordPress login URL is by using a plugin. Luckily, there are plenty of plugins available that can enable this functionality.
WPS Hide Login is a great option since it’s lightweight. It allows you to safely change your WordPress admin login page to anything you want:

Better yet, WPS Hide Login also prevents all logged-out users access to the wp-admin directory and wp-login.php.
To get started, you’ll need to install and activate the plugin. Then, head to Settings > WPS Hide Login:
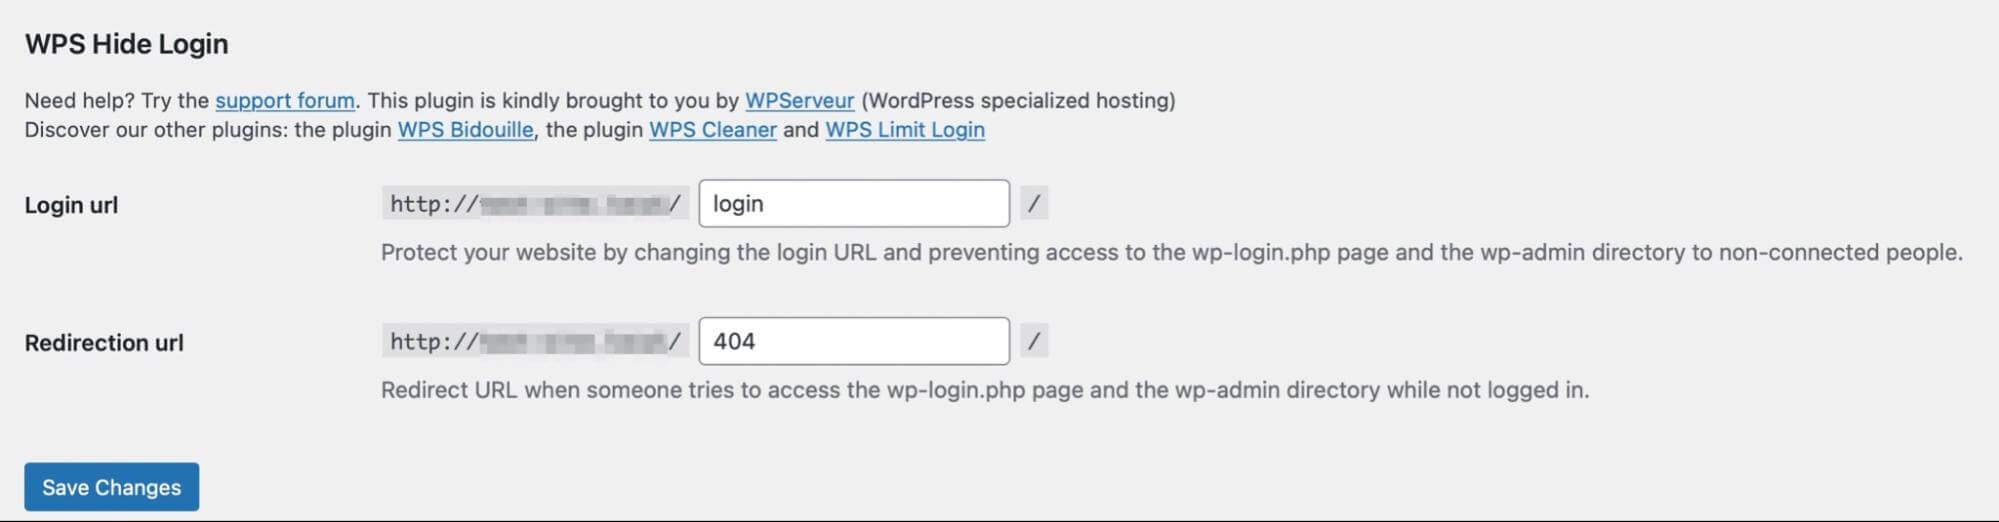
Here, you can type in a new login URL and hit Save Changes. It’s as simple as that. The plugin also has a pretty active support forum that you can check out if you need any help.
Bear in mind that once this plugin is active and you make your changes, you won’t have access to your old login screen. Instead, you’ll be directed to the new login you created.
Based on our example above, you would now need to enter “/login” after your domain to access your site. Additionally, keep in mind that your site will revert back to using wp-admin and wp-login.php if you deactivate the plugin.
Get Content Delivered Straight to Your Inbox
Subscribe to our blog and receive great content just like this delivered straight to your inbox.
Method 2: Change Your WordPress Login URL by Editing Your wp-login.php File
This second method is a little trickier and only suitable for experienced users. Therefore, before you get started with the following steps, it’s best to make a fresh backup of your site in case anything goes wrong.
It’s also important to know that your changes may revert to their previous settings when you update your theme. However, you can avoid this issue by using a child theme.
First, you’ll need to access your root folder, which you can do via your File Manager or using FTP. Again, you’re looking for the folder titled public_html:
Inside the root folder, locate the wp-login.php folder. This is where the code that generates your site’s login page is kept:

Once you’ve found the file, you can download a copy of it to your computer. Then, open the folder using a text editor like Sublime or Notepad++.
Ideally, it’s best to use an editor that provides a “search and replace” tool. This way, you can change all the existing WordPress login URL instances much more quickly.
If you have access to it, use the search tool to find every instance of the wp_login_url string:
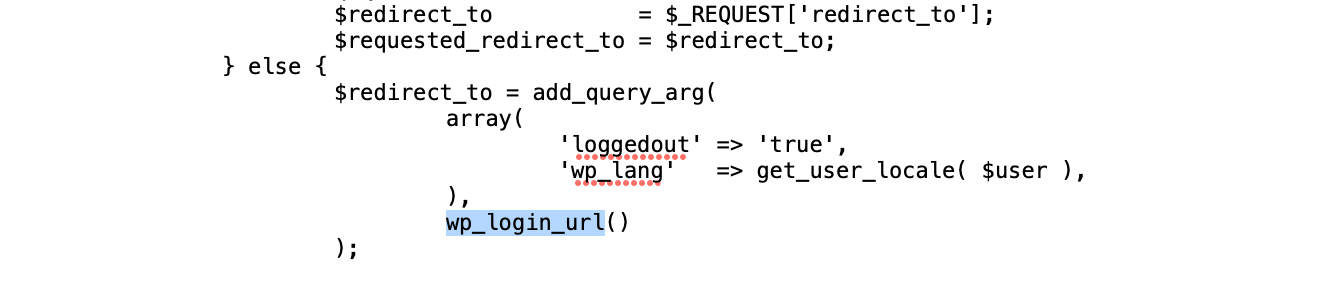
Then, change these strings to the new login URL that you’d like to use. Remember, you can keep it simple and straightforward so long as it’s original (and different from the default). For example, you might prefer something like access.php or wp-new-login.
Once you’re happy with your changes, save and close the editor. Then, rename the file after the new URL that you chose (such as access.php).
Now, you can upload the new file to your root directory using your FTP client or File Manager. Simply select the modified login file from your computer. Then, register the new login file using the “login_url” filter hook. This enables you to use any page as your sign-in page as long as it contains a login form.
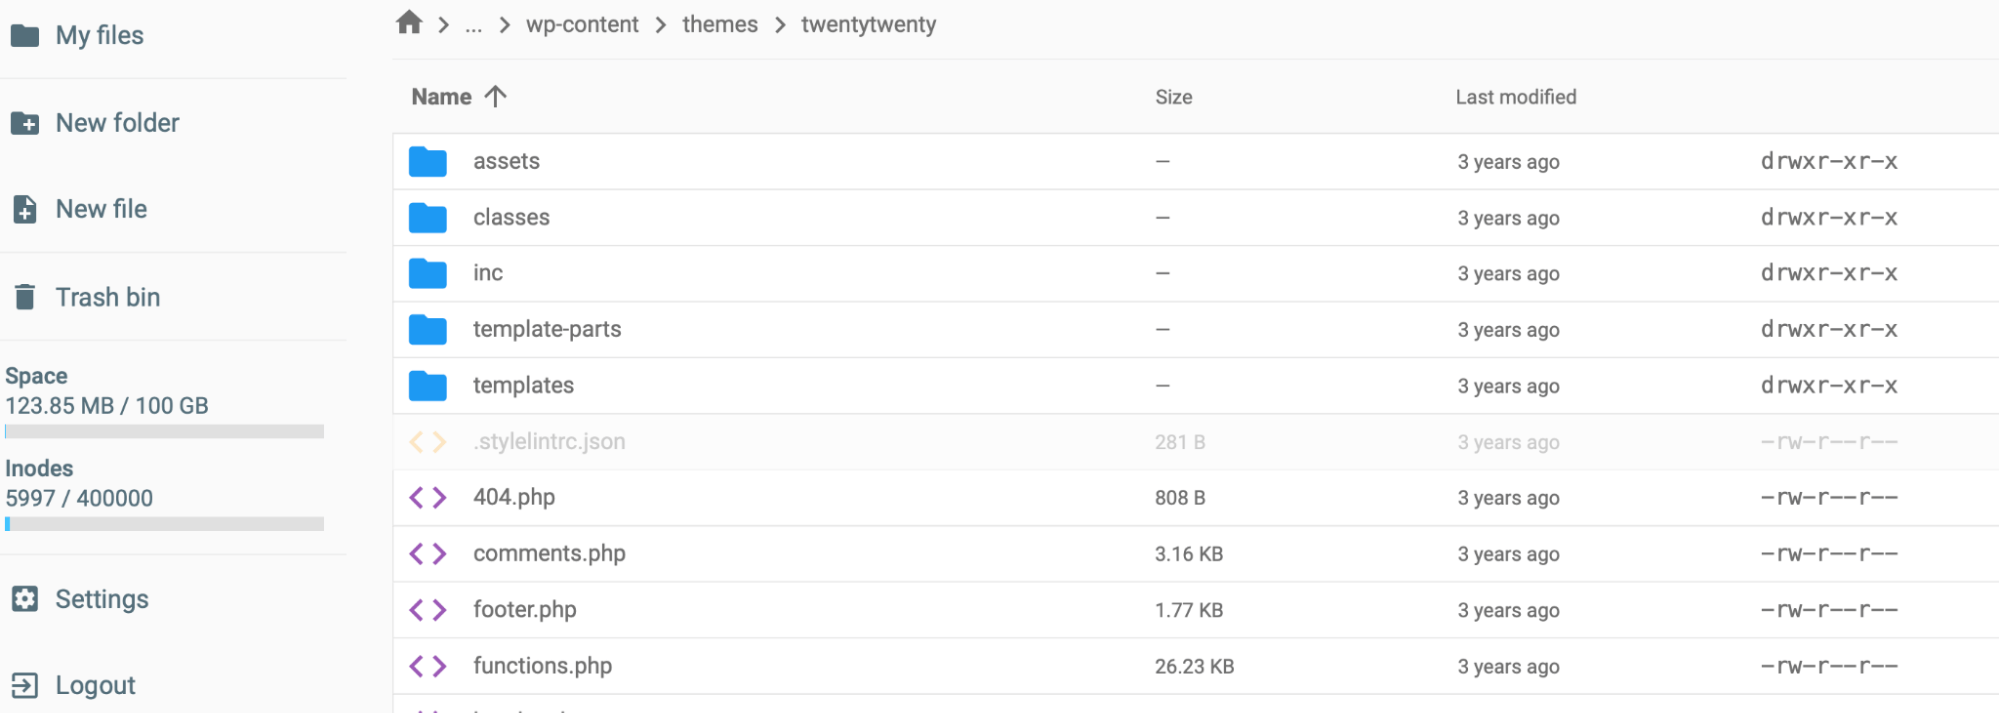
To do this, navigate to wp-content > themes to find your theme functions file. Select your active theme and open the functions.php file:
Now that you’re here, you can paste the following line of code into the file:
/*
*Change WP Login file URL using “login_url” filter hook
*https://developer.wordpress.org/reference/hooks/login_url/
*/
add_filter( ‘login_url’, ‘custom_login_url’, PHP_INT_MAX );
function custom_login_url( $login_url ) {
$login_url = site_url( ‘wp-your-new-login-file-name.php’, ‘login’ );
return $login_url;
}
Then remember to save your changes.
It’s important to test your new login before deleting the old file. To do this, simply type out your site’s domain with your new login URL added to the end. Then, if you see the WordPress login form, you can delete the original wp-login.php file.
Other Ways to Secure Your WordPress Login Process
Changing your WordPress login URL is great for tightening up security on your site. However, it’s not all you can do. Here are some other ways to secure your WordPress login process.
1. Limit Login Attempts
When you limit login attempts, you can stop hackers and bots that attempt to access your site by trying hundreds of usernames and passwords. This is especially important since brute force attacks are the second most common type of online threat.
The easiest way to do this is by using a plugin like Limit Login Attempts Reloaded:
This plugin gets to work as soon as it’s activated on your site. By default, users have four chances to log in before they get locked out of WordPress. However, you can visit the plugin’s settings to modify this:
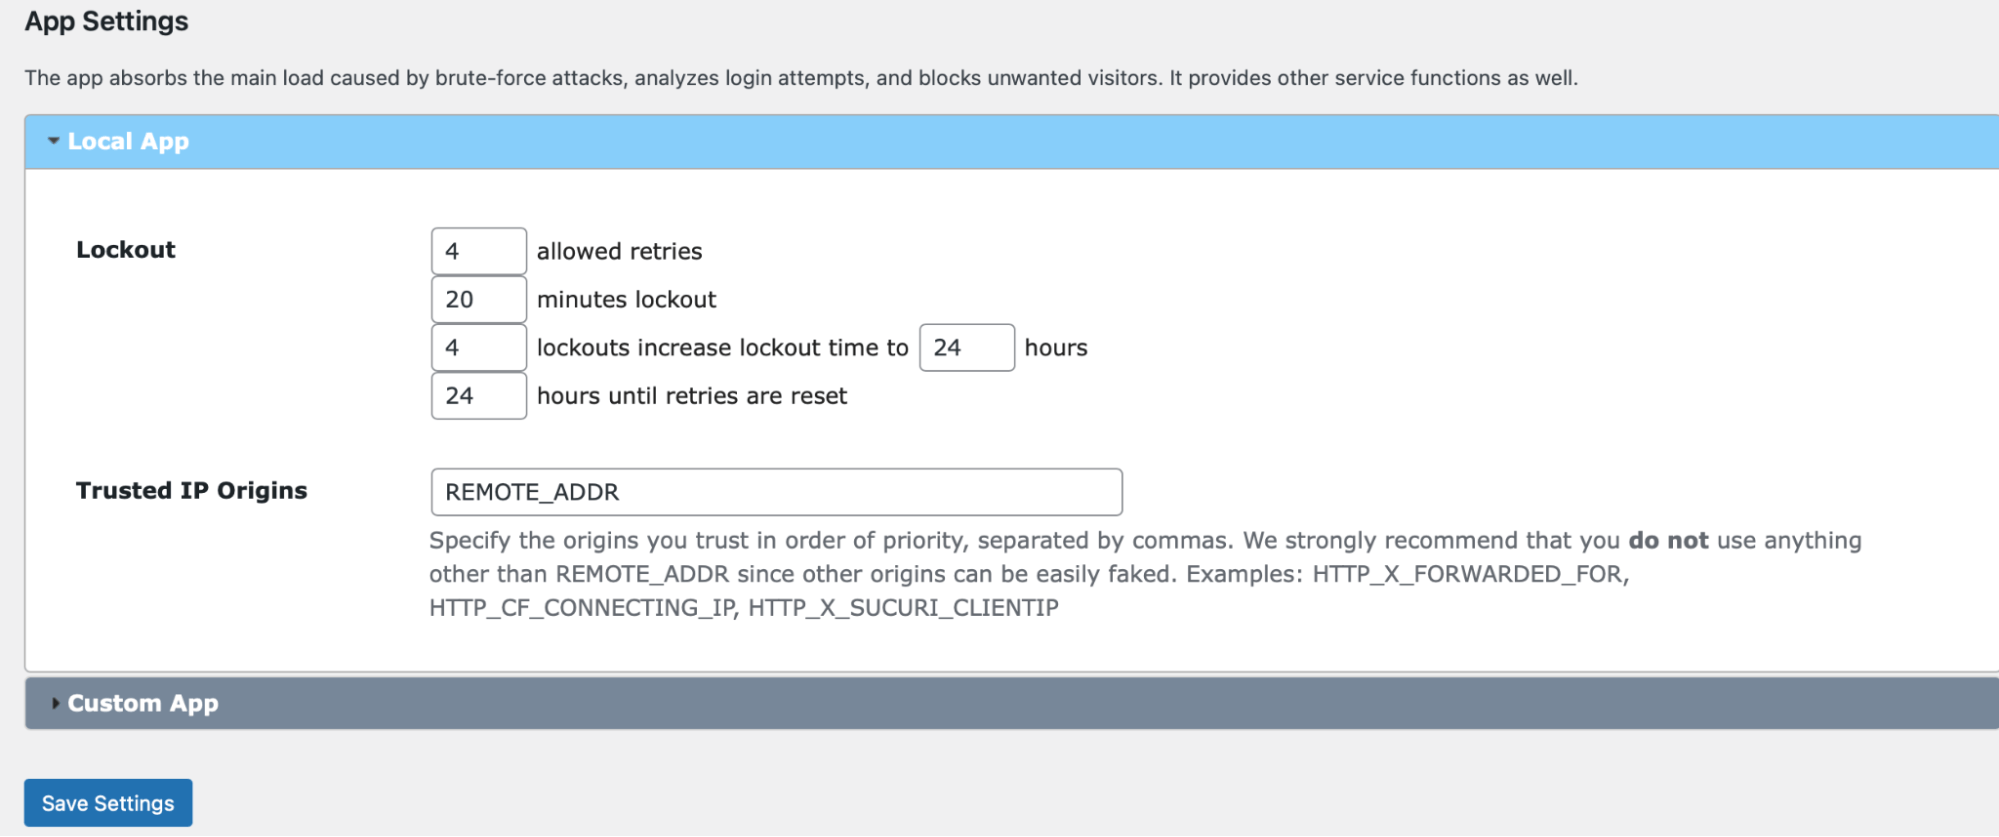
Here, you can also determine the length of time that users stay locked out. In your dashboard, you’ll see how many brute-force attacks have been blocked by the plugin. Plus, you can switch to the Logs tab to manually blocklist specific IP addresses.
Implement Two-Factor Authentication
Two-factor authentication requires users to submit more than just their standard login credentials. Instead, users are asked to generate a second key in real-time. This is often a code sent via SMS text message, email, or an app:
Since bots and hackers are unable to produce the second key, this is a great way to prevent unauthorized access to your site. One of the best ways to add this functionality to your site is by using a plugin like miniOrange:
Once activated, head to the new miniOrange 2-Factor link in your admin area and find the Account section. To configure the plugin, you’ll have to register for an account. This is completely free and only takes a minute. Then, you’ll receive a code that enables you to verify your email.
At this stage, navigate to Two Factor and use the Setup Two Factor tab. Here, you can choose your preferred method of authentication. For instance, you can use the Google Authenticator app, SMS text messages, QR codes, or security questions:
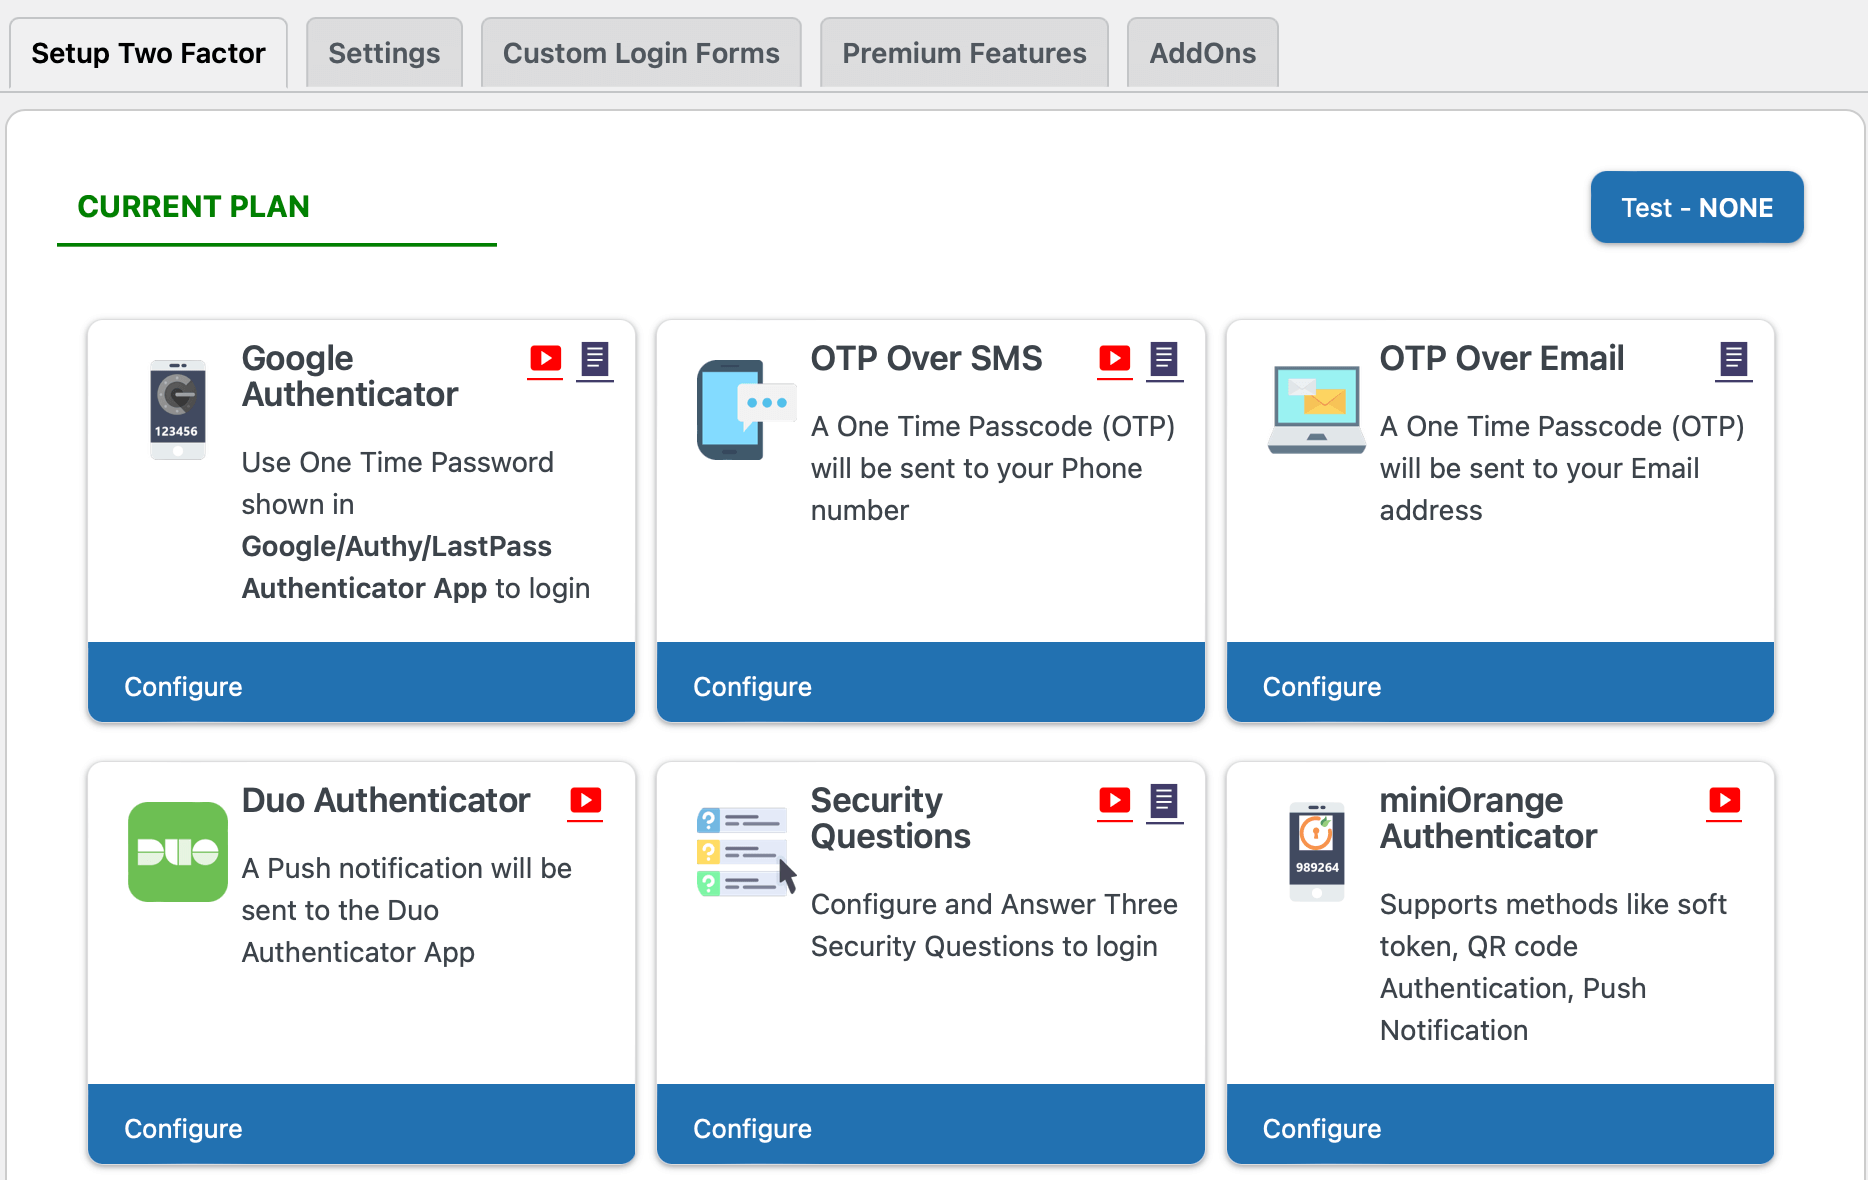
Lastly, if you switch to Settings, you can enable two-factor authentication for all users, specific users, and display your two-factor prompt on your login page.
3. Use CAPTCHA
CAPTCHA or reCAPTCHA provides an extra layer of security for your website. Typically, it’s used to control access to sensitive pages. What’s more, it can deter bots from creating spam or accessing personal information via order forms or login forms on your site.
Again, a plugin is the easiest way to enable CAPTCHA on your site. With reCaptcha, you can add a simple CAPTCHA checkbox to any form you like:
You’ll need to install and activate the plugin on WordPress. Then, register your site with Google to retrieve your Google API keys. In WordPress, you can head to Google Captcha > Settings to enter your keys and determine which forms should use CAPTCHA.
4. Enforce Strong Passwords
It’s a great idea to change the WordPress login URL, so you’re not using the easily-guessable “admin” suffix. However, your efforts are wasted if you continue using weak or repeated passwords that put your account at a greater risk of attack.
In fact, only 24% of U.S. web users use a different password for each of their online accounts. Meanwhile, just 44% of users use a password manager to generate and store passwords securely.
Going forward, it’s best to opt for lengthy passwords with upper and lower case letters combined with numbers and special characters. We’d also recommend using a password manager like LastPass for extra peace of mind:
Plus, it’s important to encourage strong passwords from users with access to your website. You can clarify this in the welcome email users receive upon registering to your site.
Change Your WordPress Login URL to Increase WordPress Security
It can be challenging to ensure foolproof security on your WordPress website. Fortunately, one way you can do this is by changing your WordPress login URL. This way, your login page is almost impossible to find unless you provide users with your new, custom login URL.
Here are two ways to change the WordPress login URL:
- Use a plugin like WPS Hide Login.
- Edit your wp-login.php file.
Another excellent way to tighten WordPress security is to use a quality web host. At DreamHost, we offer a range of solutions to suit all kinds of users, from managed WordPress hosting to managed VPS hosting. Check out our plans to get started!
Do More with DreamPress
DreamPress Plus and Pro users get access to Jetpack Professional (and 200+ premium themes) at no added cost!
